
Notifications
Clear all

Topic starter
21/07/2020 11:03 am
First of all we want to give special thanks to our collaborator Christian Buysschaert for this step by step guide.
What do you need in Hardware?
-
Standard laptop or pc with at least one free USB port
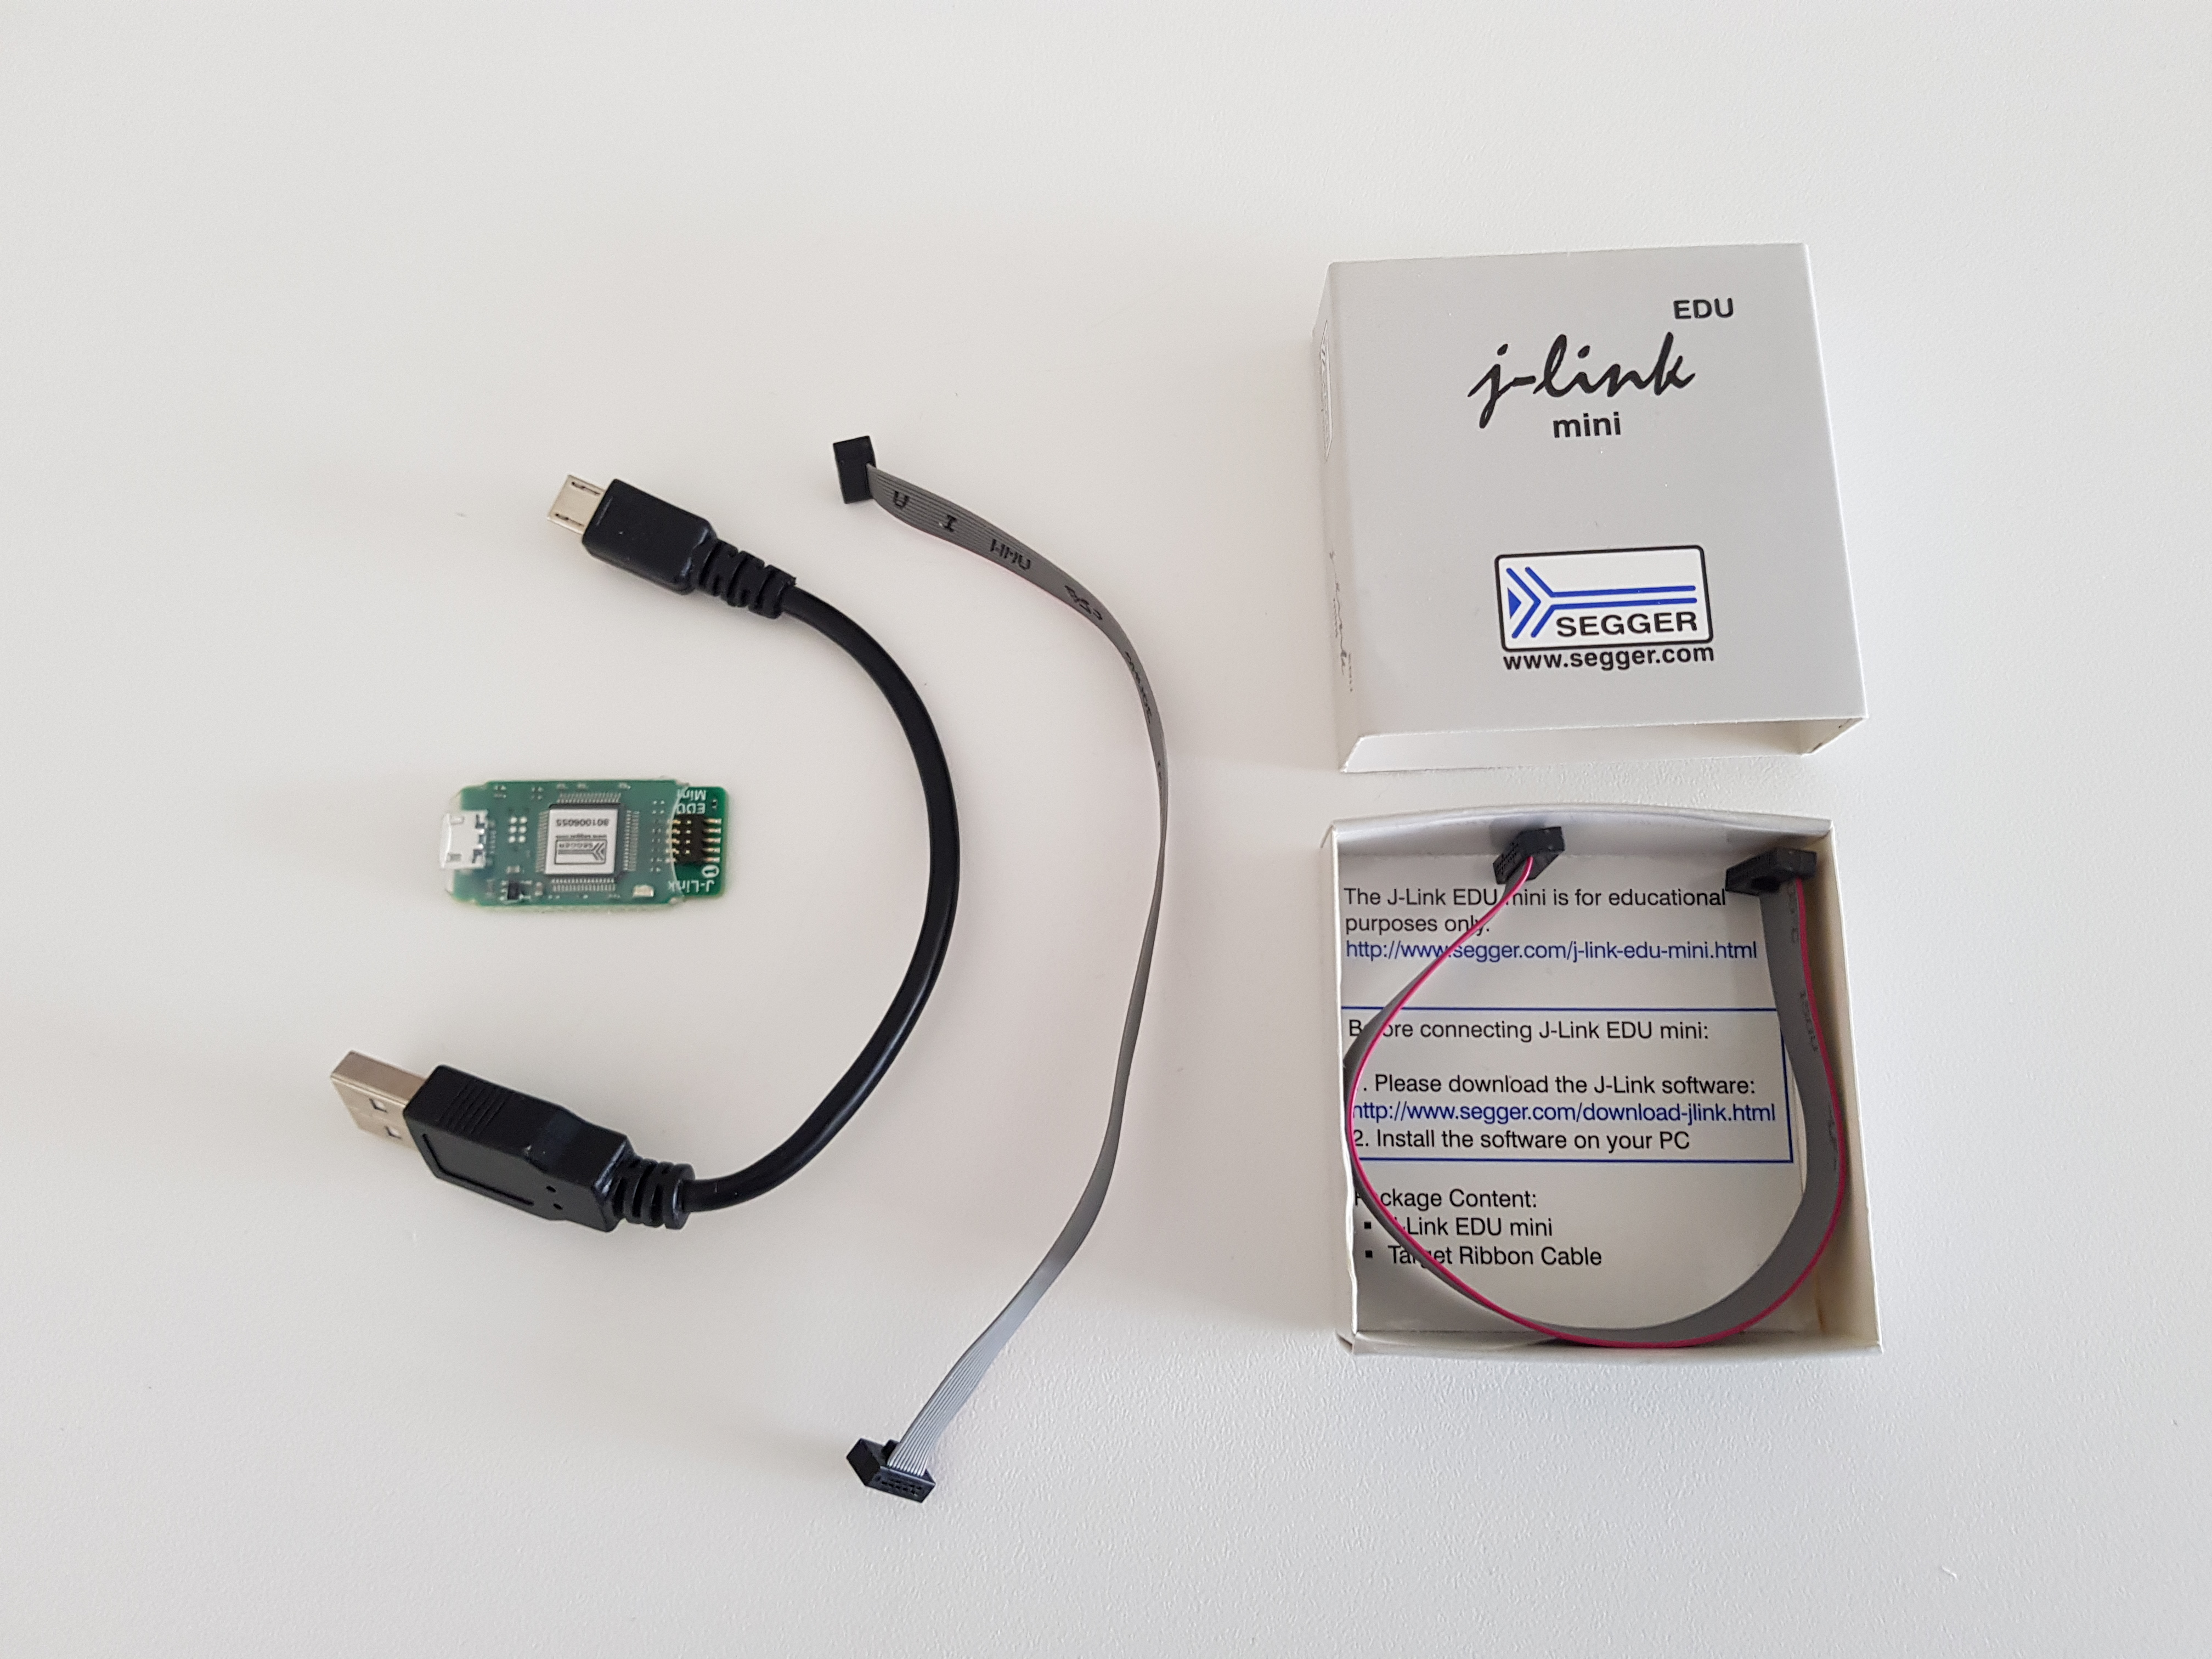
- SEGGER J-Link EDU Mini - JTAG/SWD Debugger
You can easily buy this component online. Price is around 20-30 EURO. Simply google for ‘SEGGER J-Link EDU Mini – JTAG/SWD Debugger’.

What do you need in Software?
- Download Firmware from here
-
Windows 10
-
Microship Atmel Studio 7
Free software
https://www.microchip.com/mplab/avr-support/atmel-studio-7
Procedure
- Unplug power connector from Q.bo.
- Open plastic foot cover Q.bo by unscrewing two plastic screw at the bottom of the foot

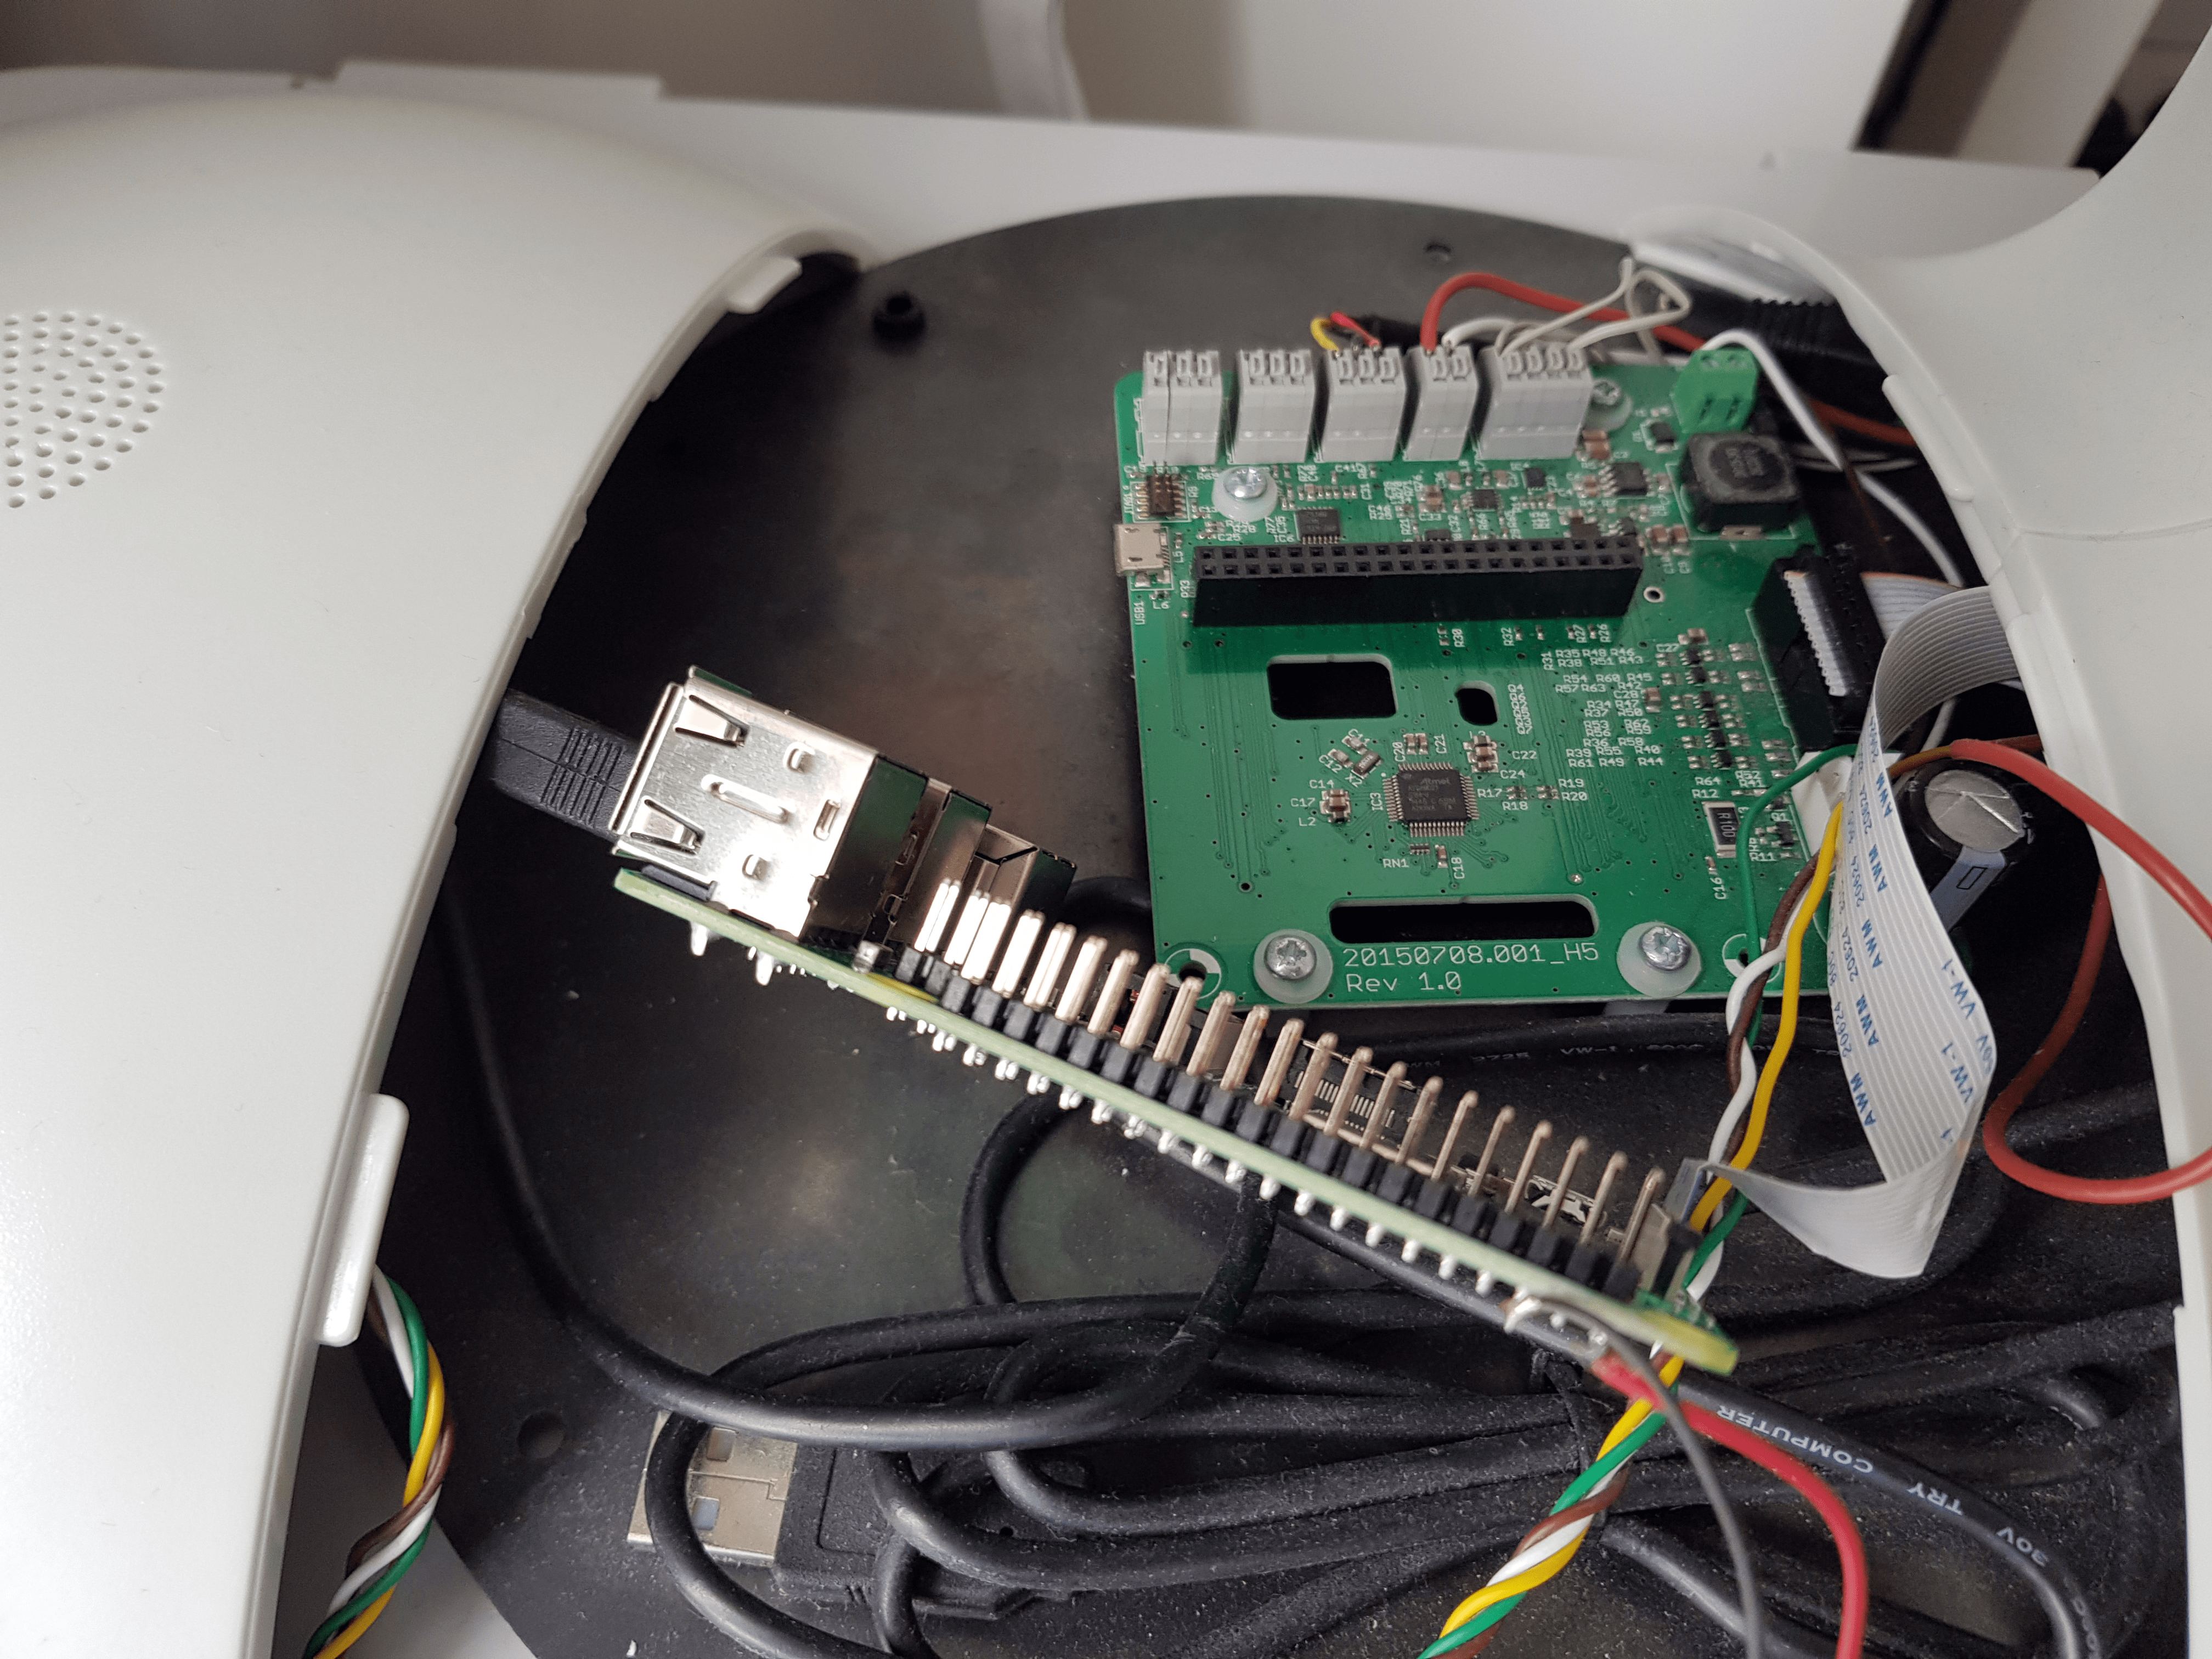
- Gently push up and disconnect the Raspberry Pi board from the Q.Board
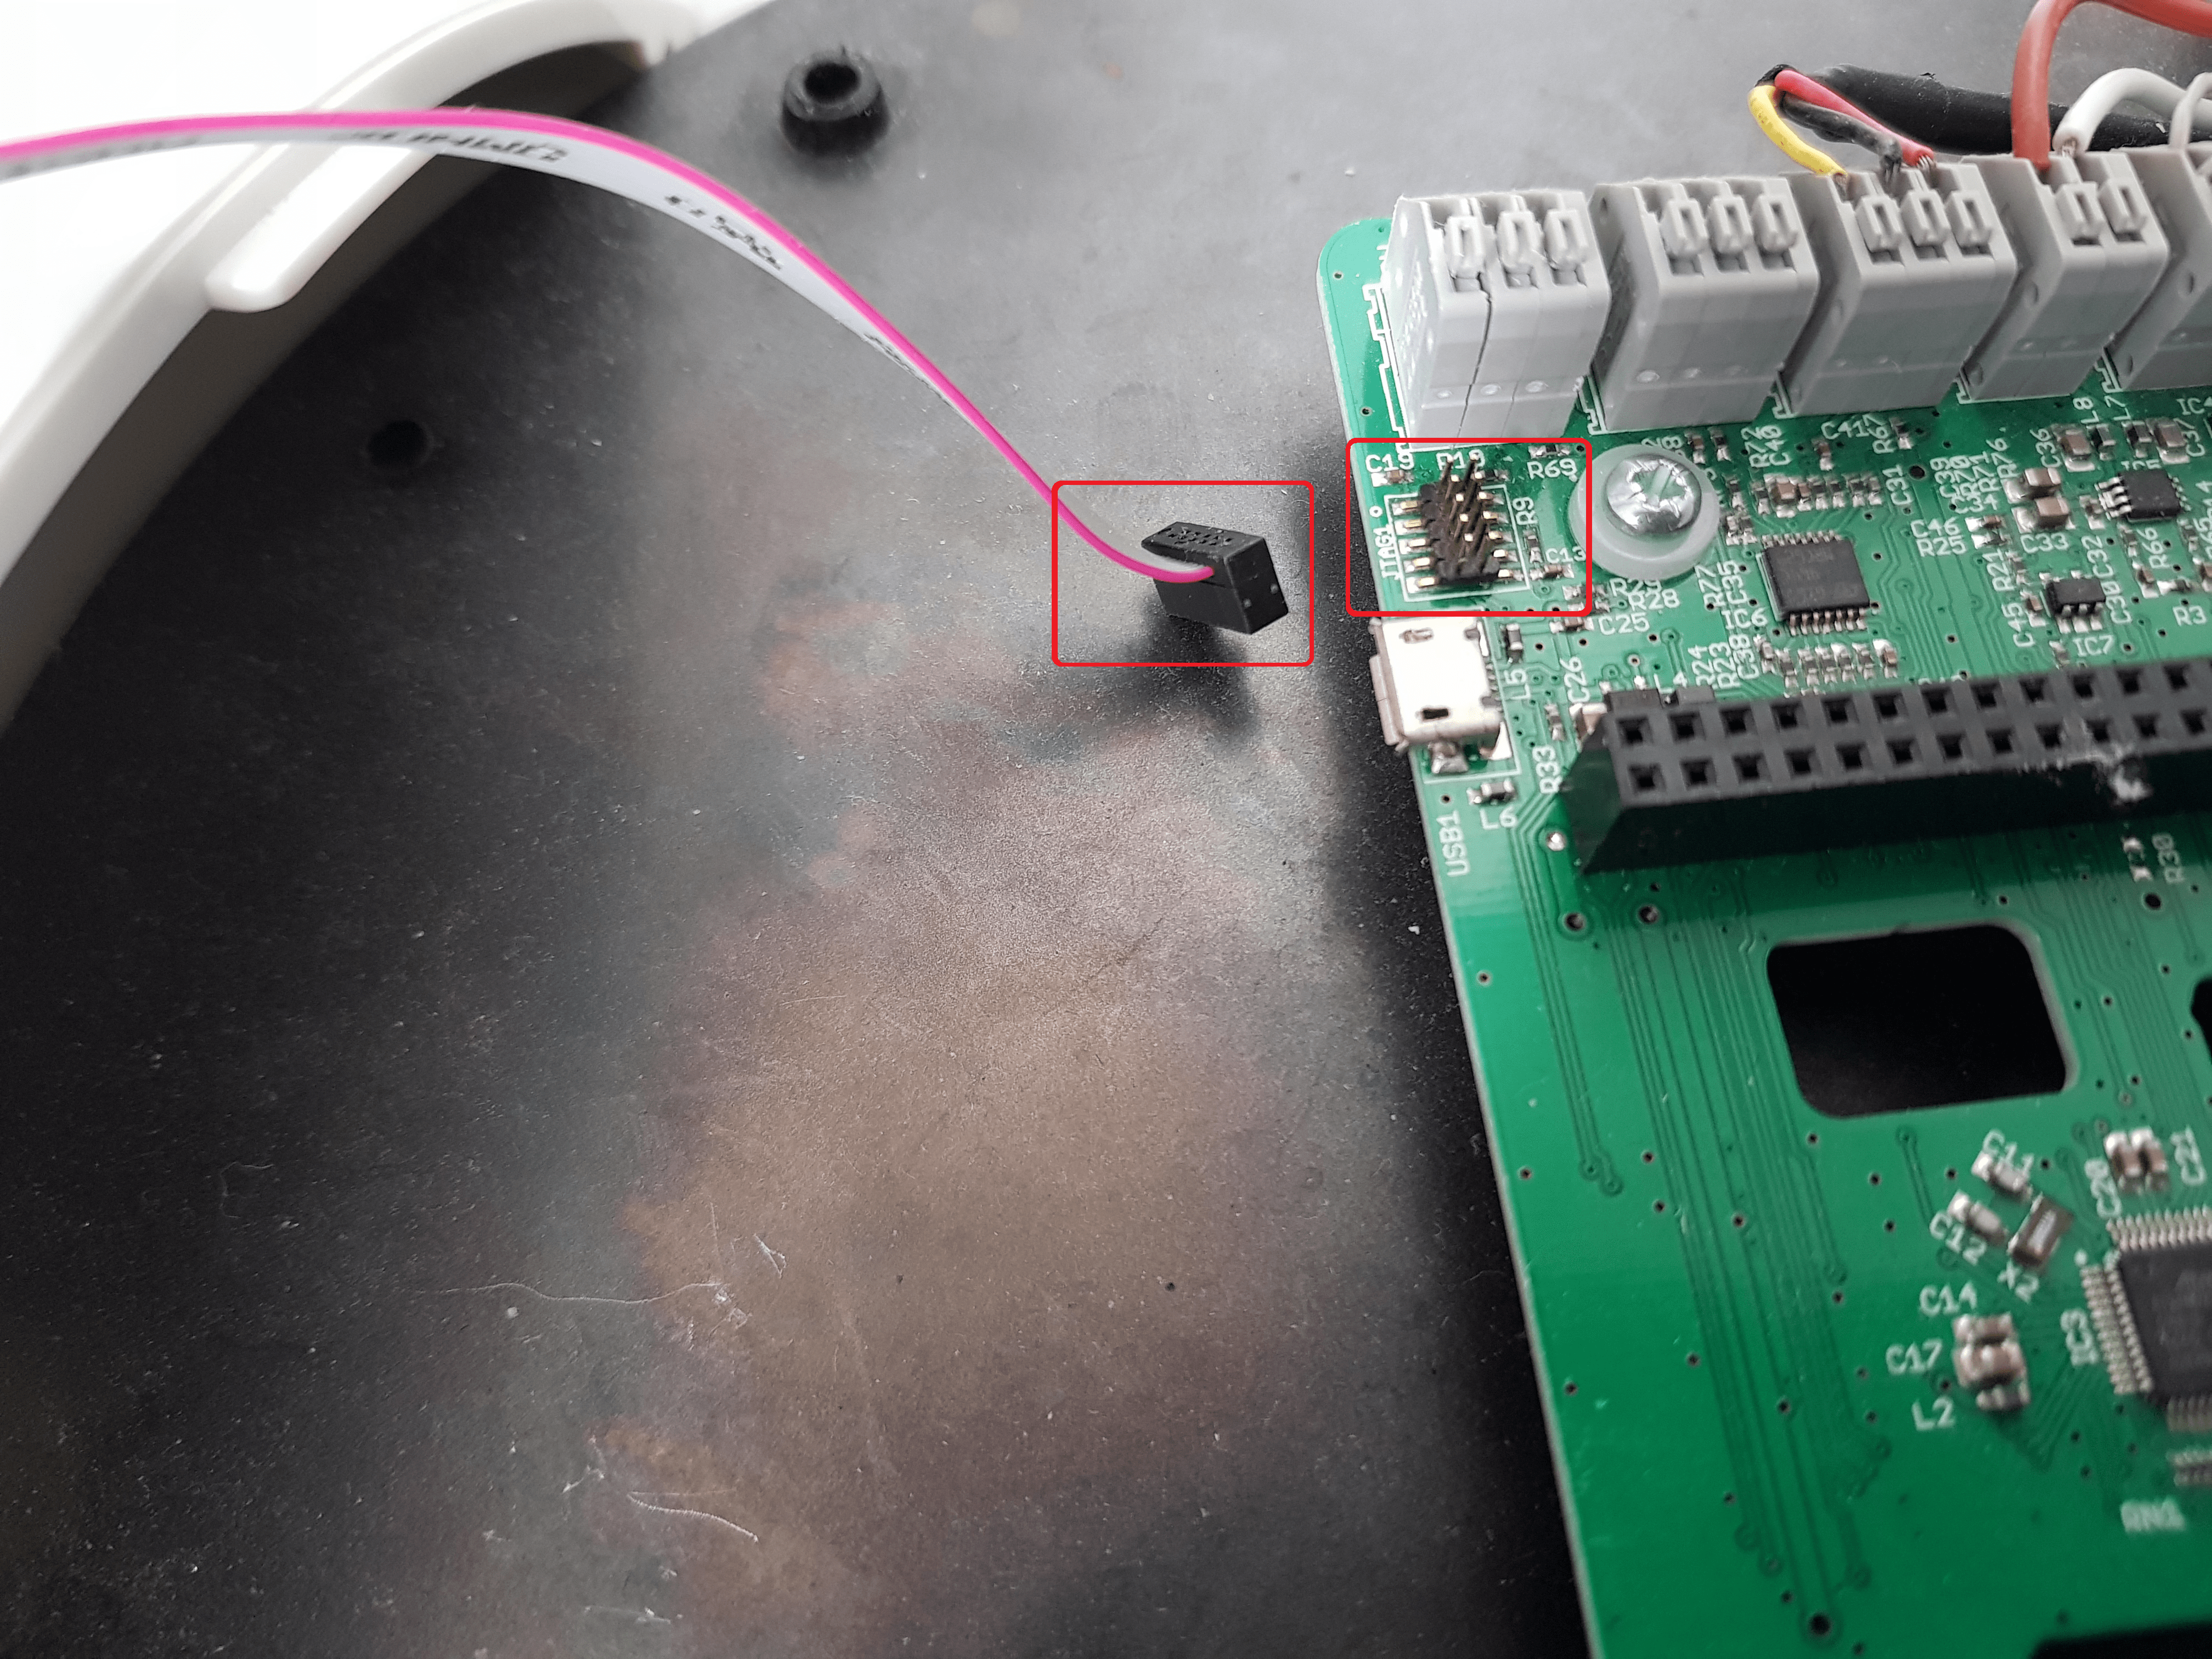
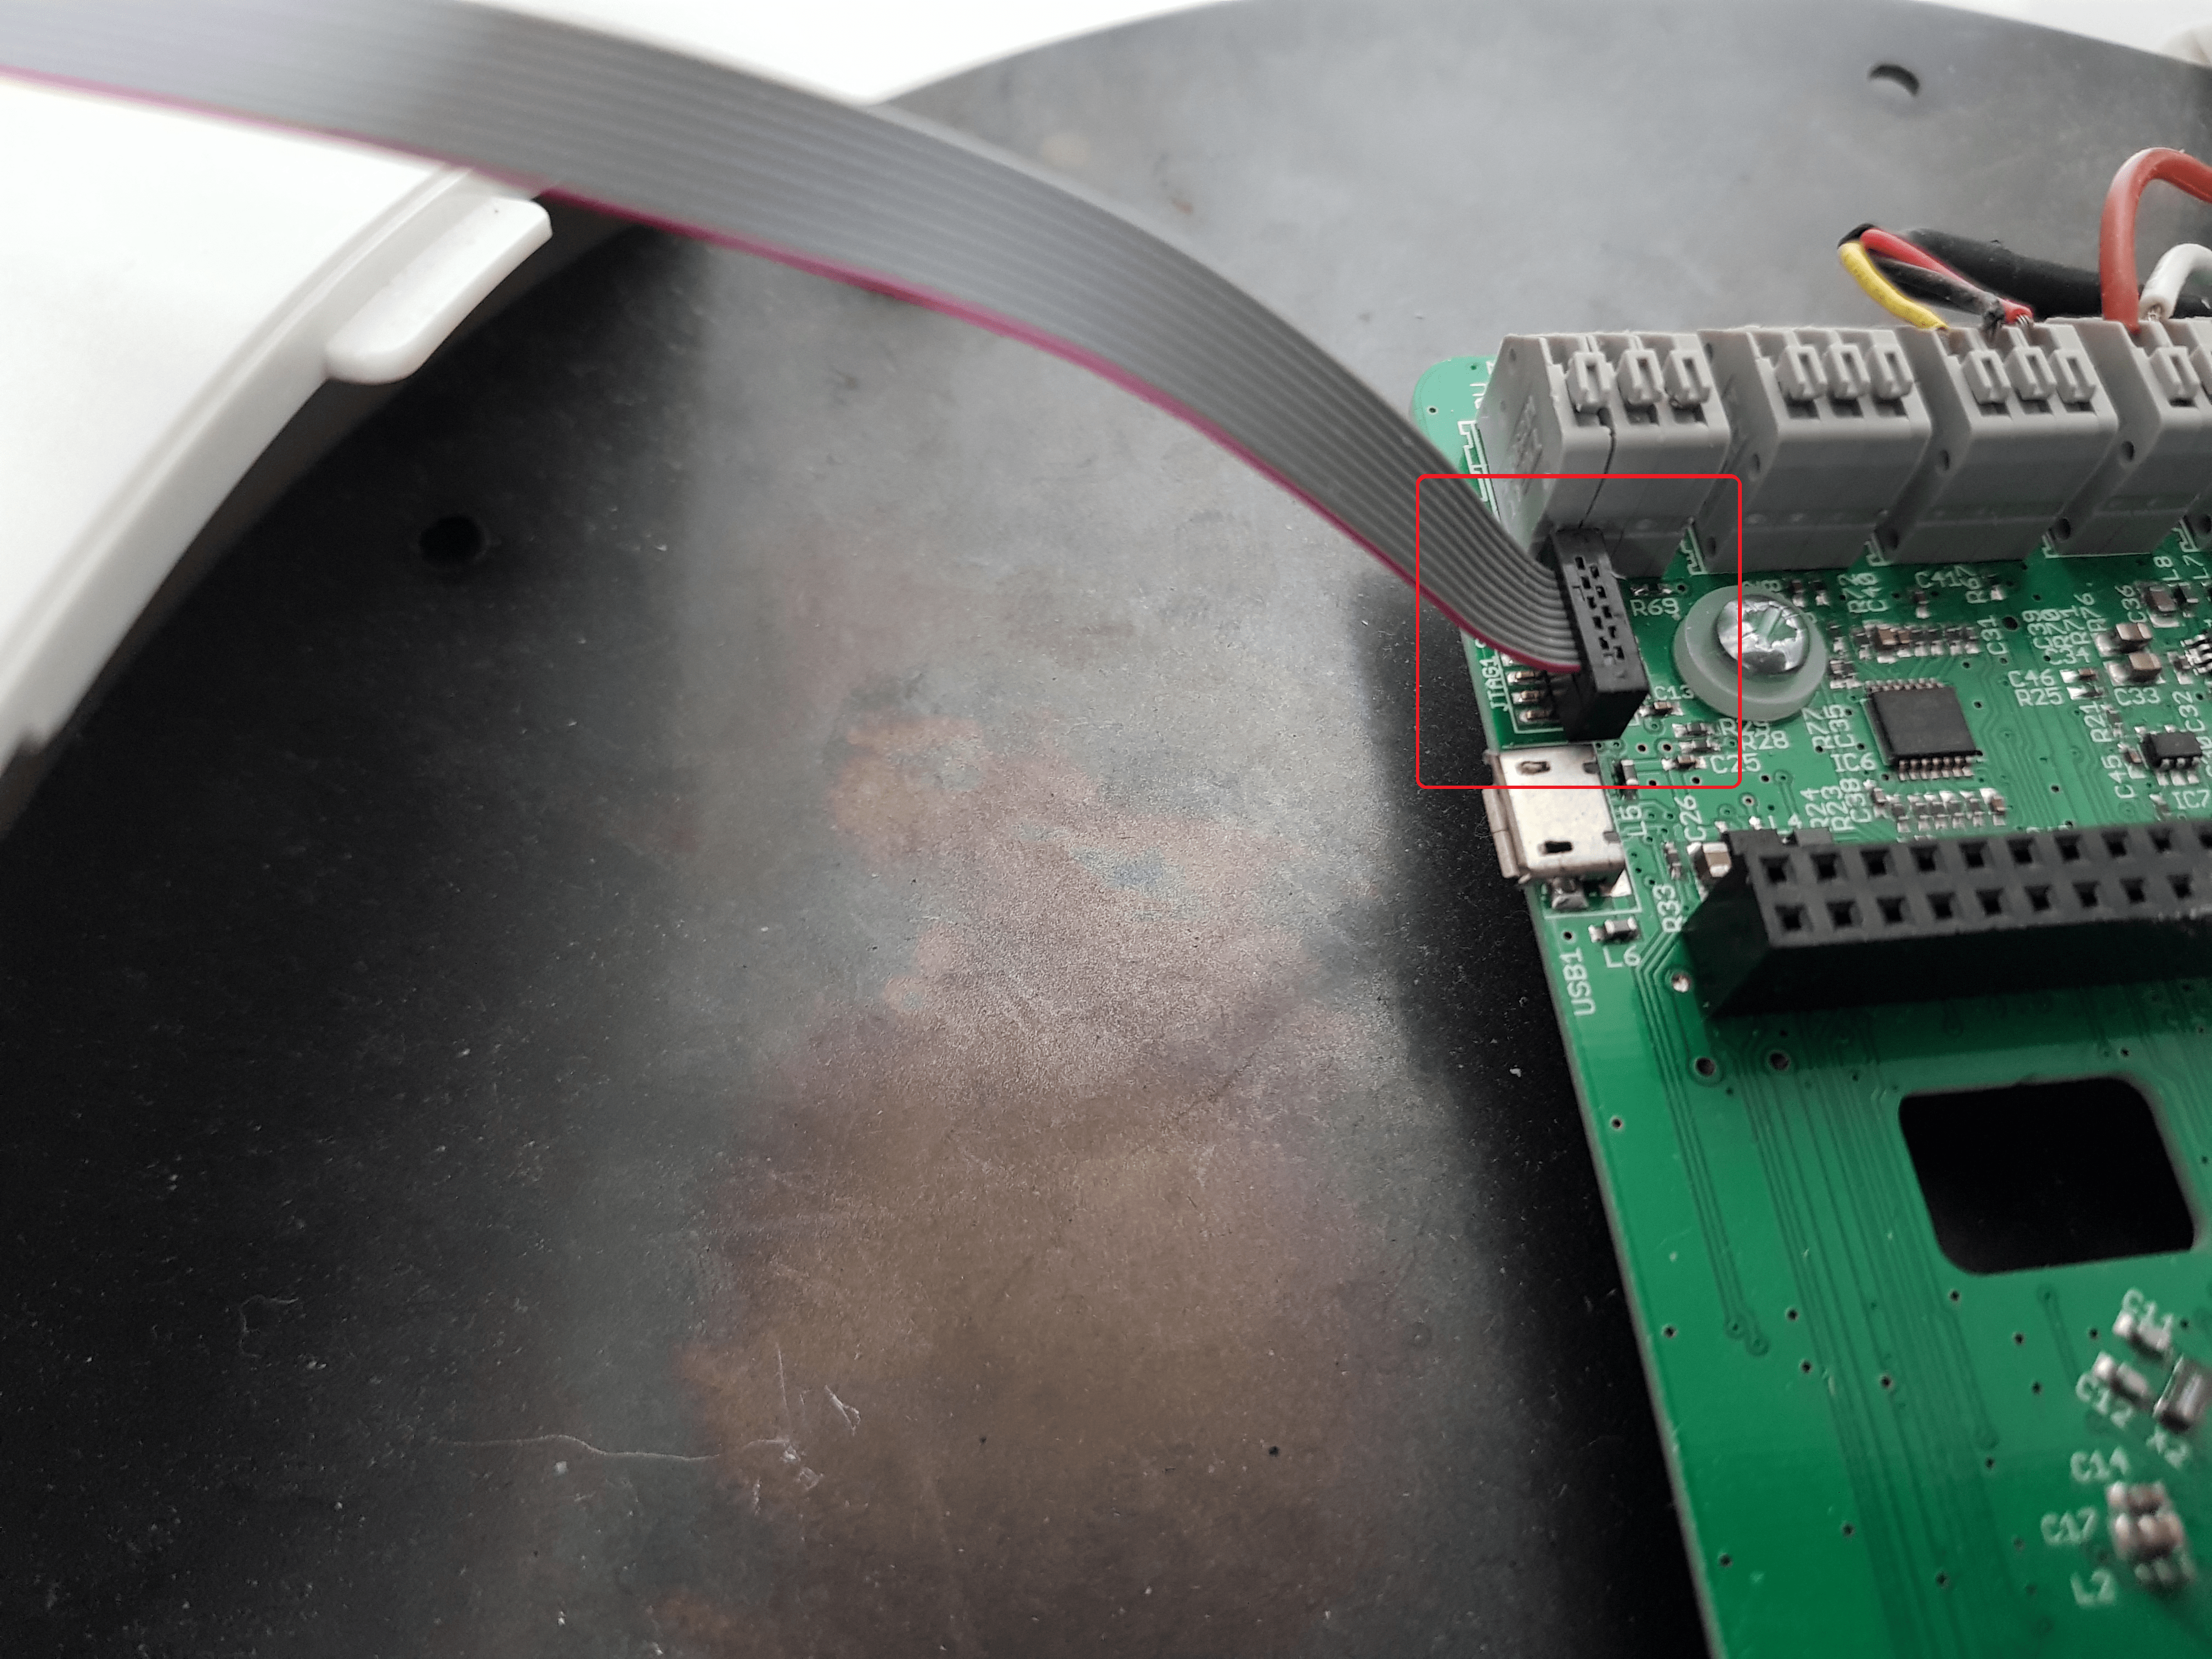
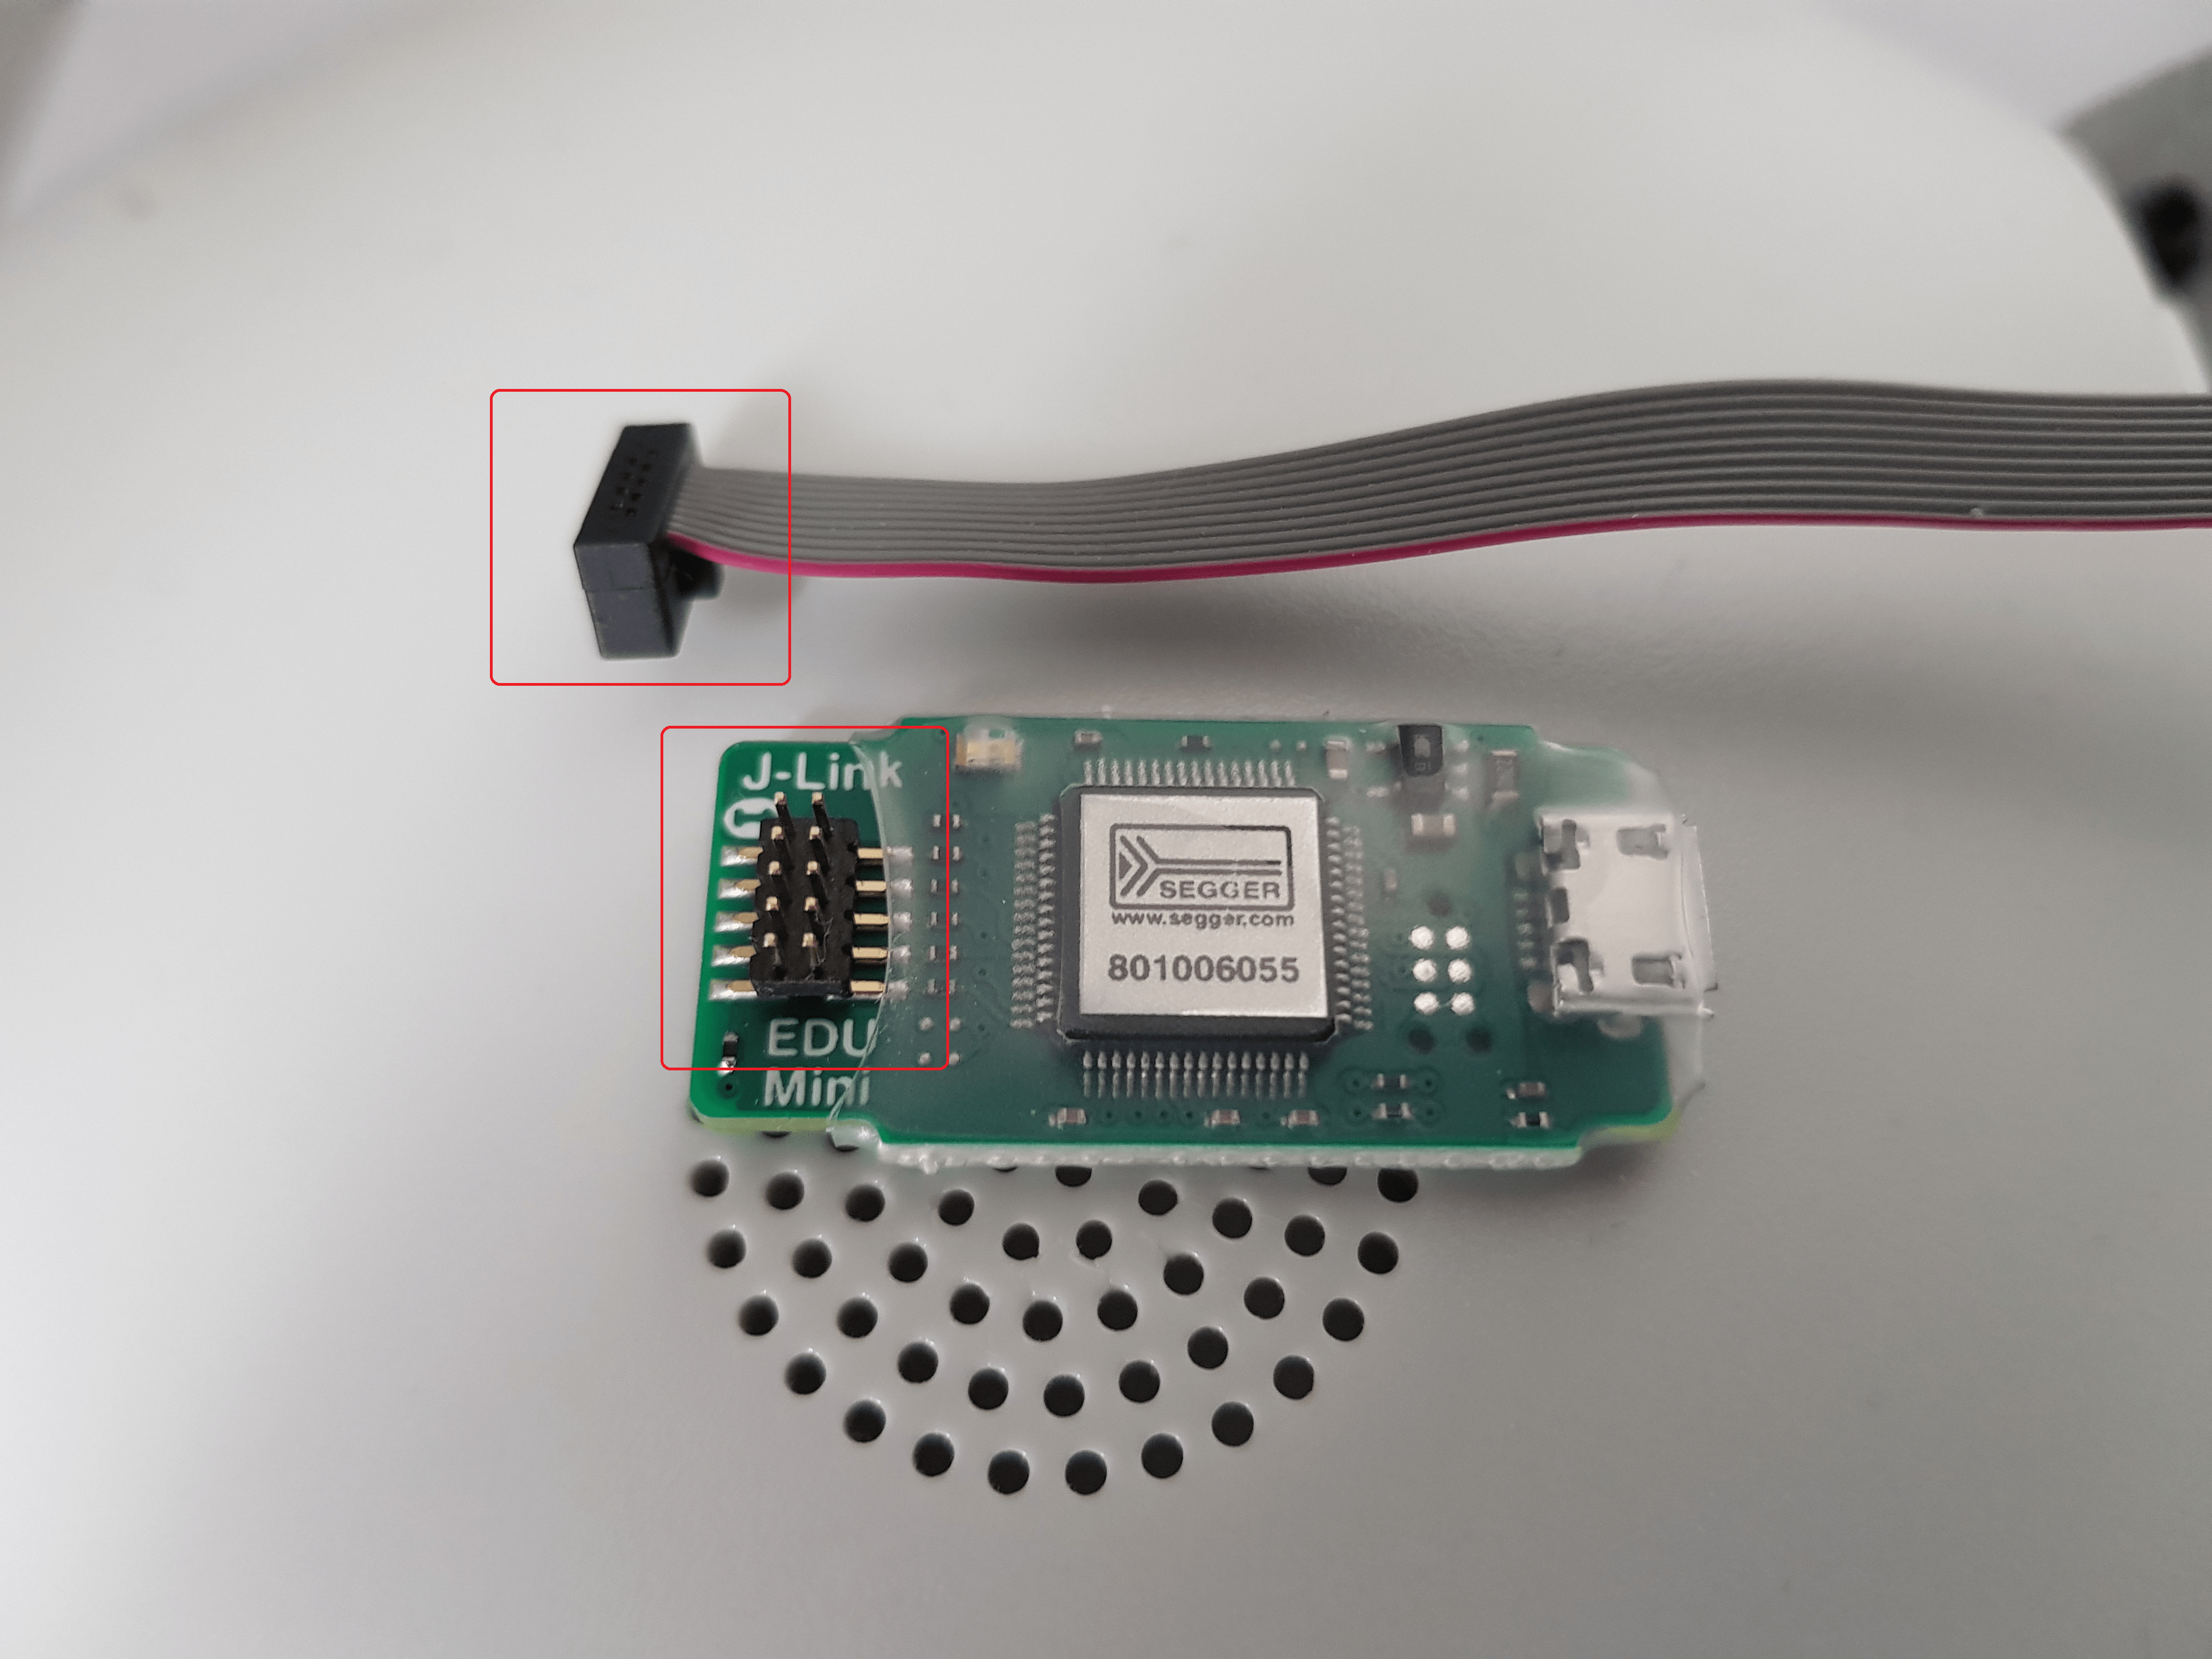
- Take the thinnest connector cable from the J-Link and connect it at one side to the Q.Board as shown below. Watch carefully how you connect the connector cable, in particular the direction.
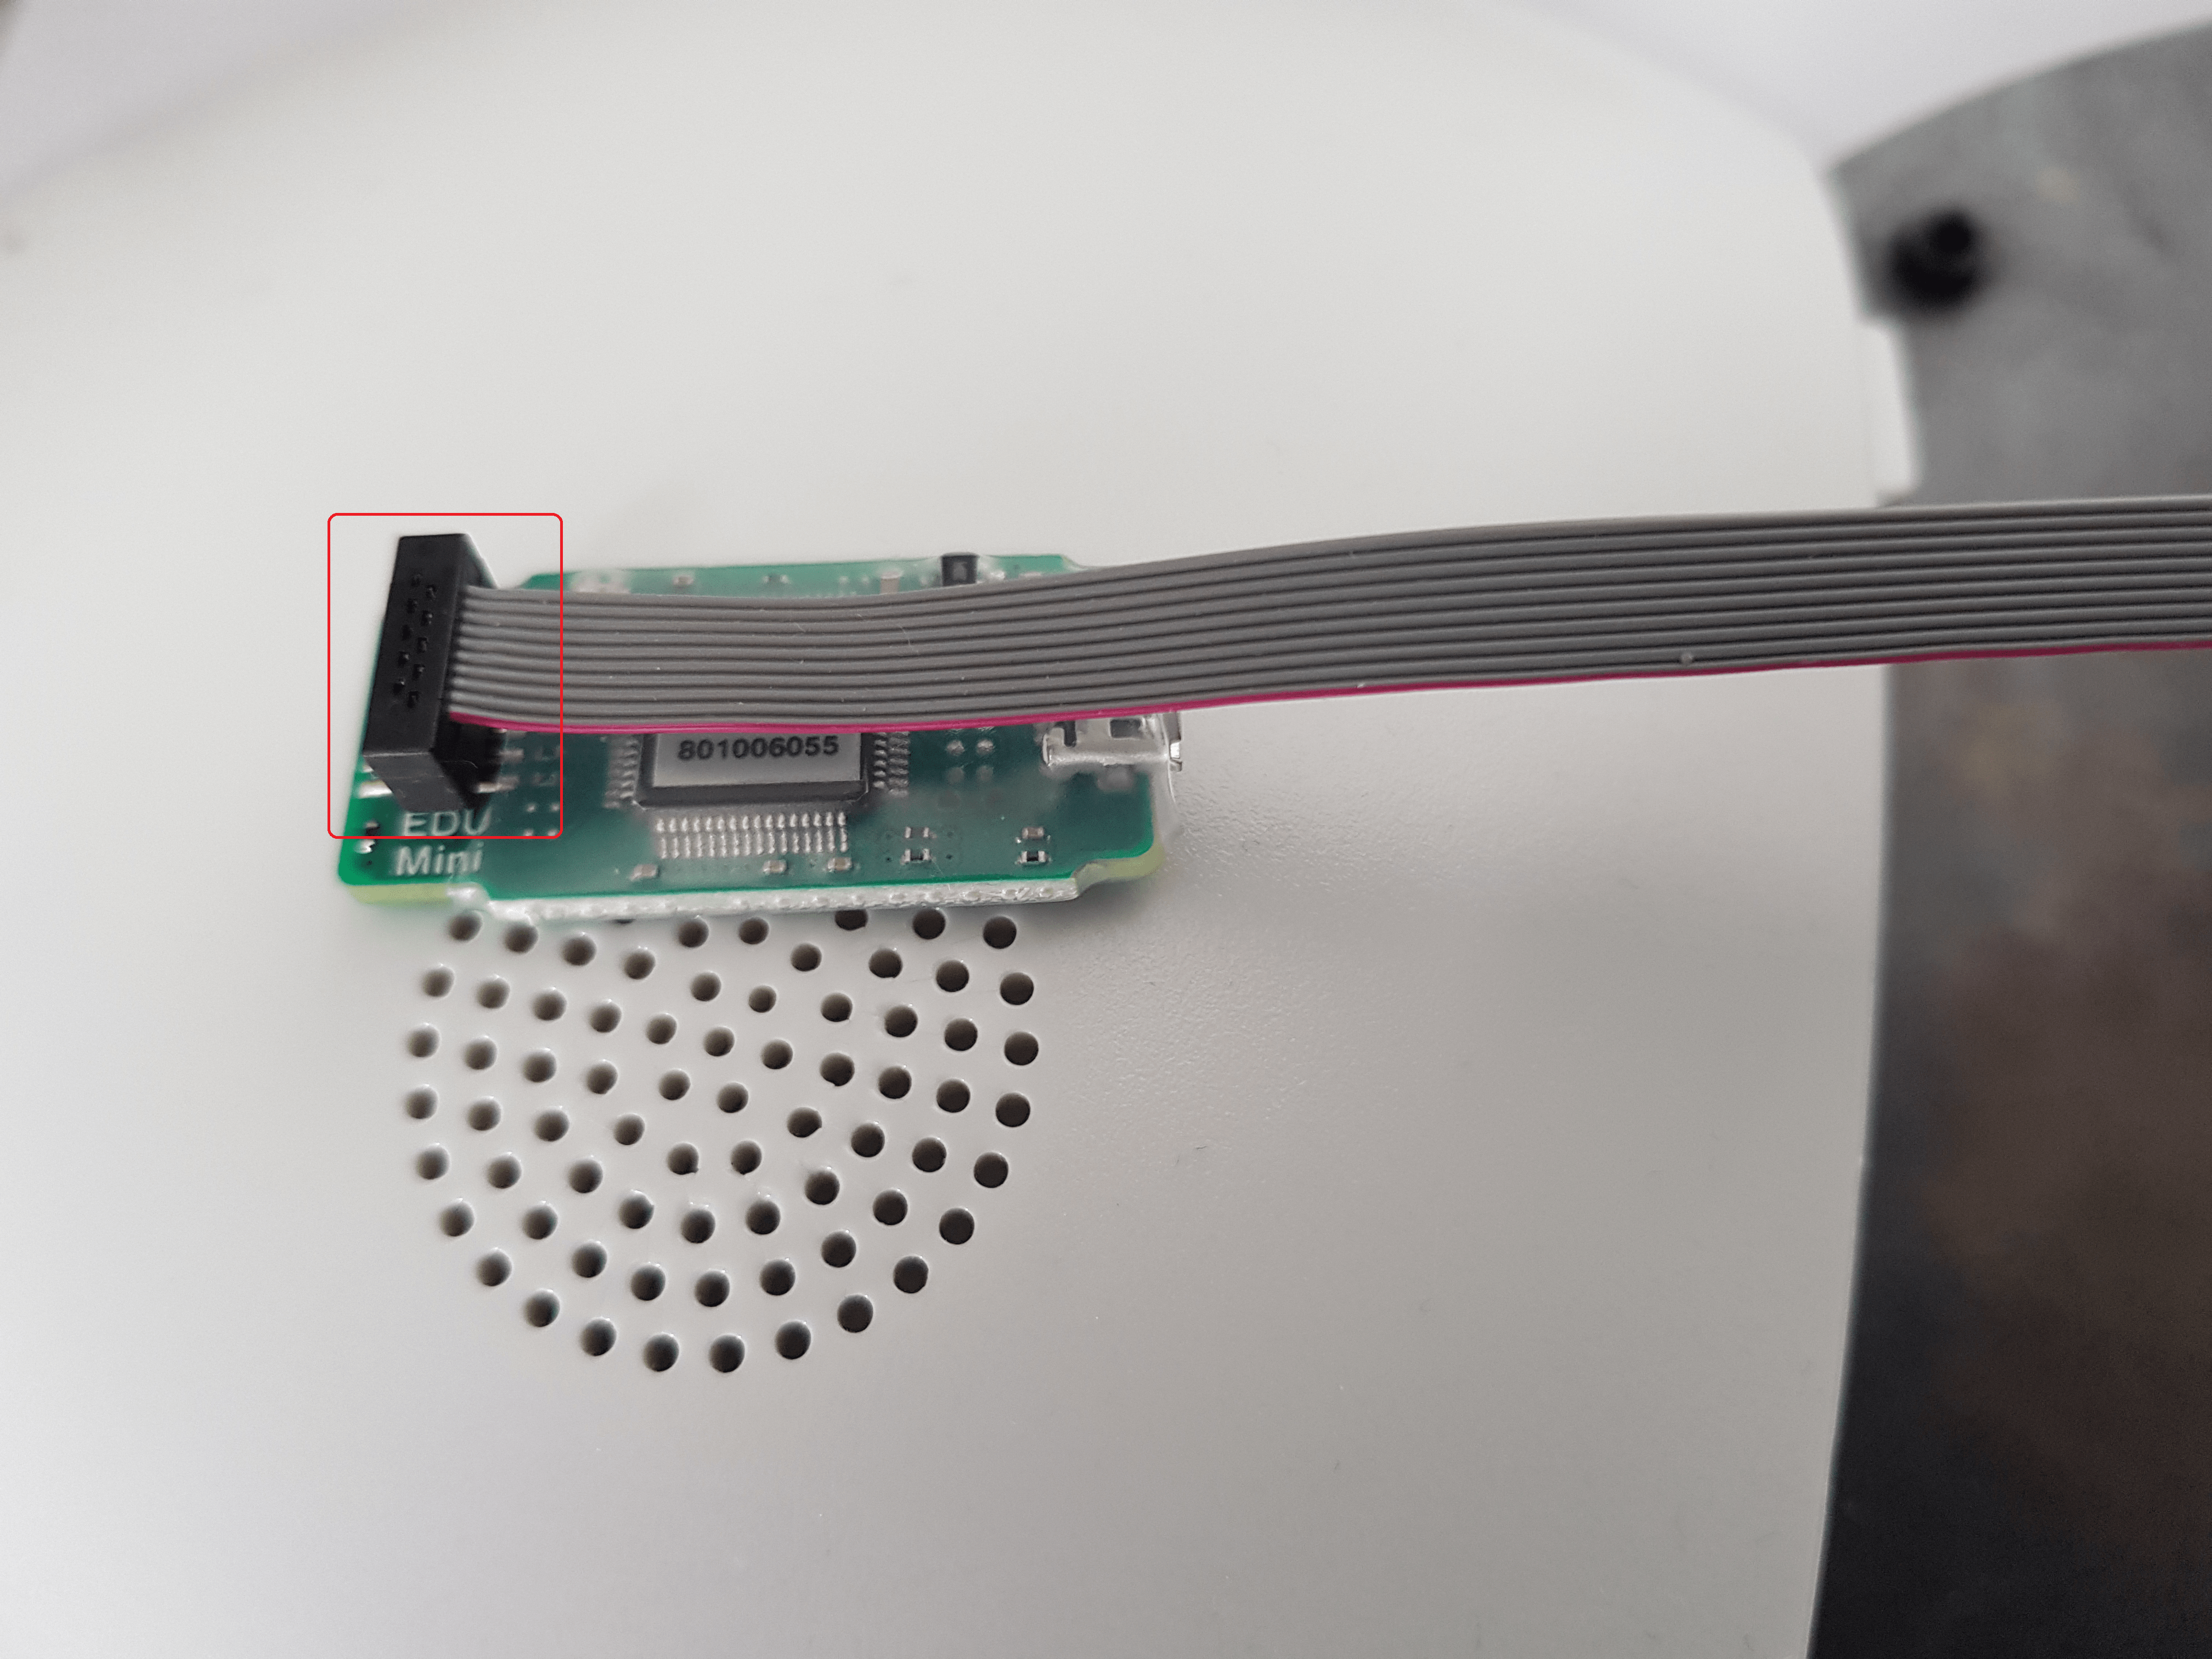
- Take the other side of the connector cable and connect it to the J-Link as shown below. Watch carefully how you connect the connector cable, in particular the direction.
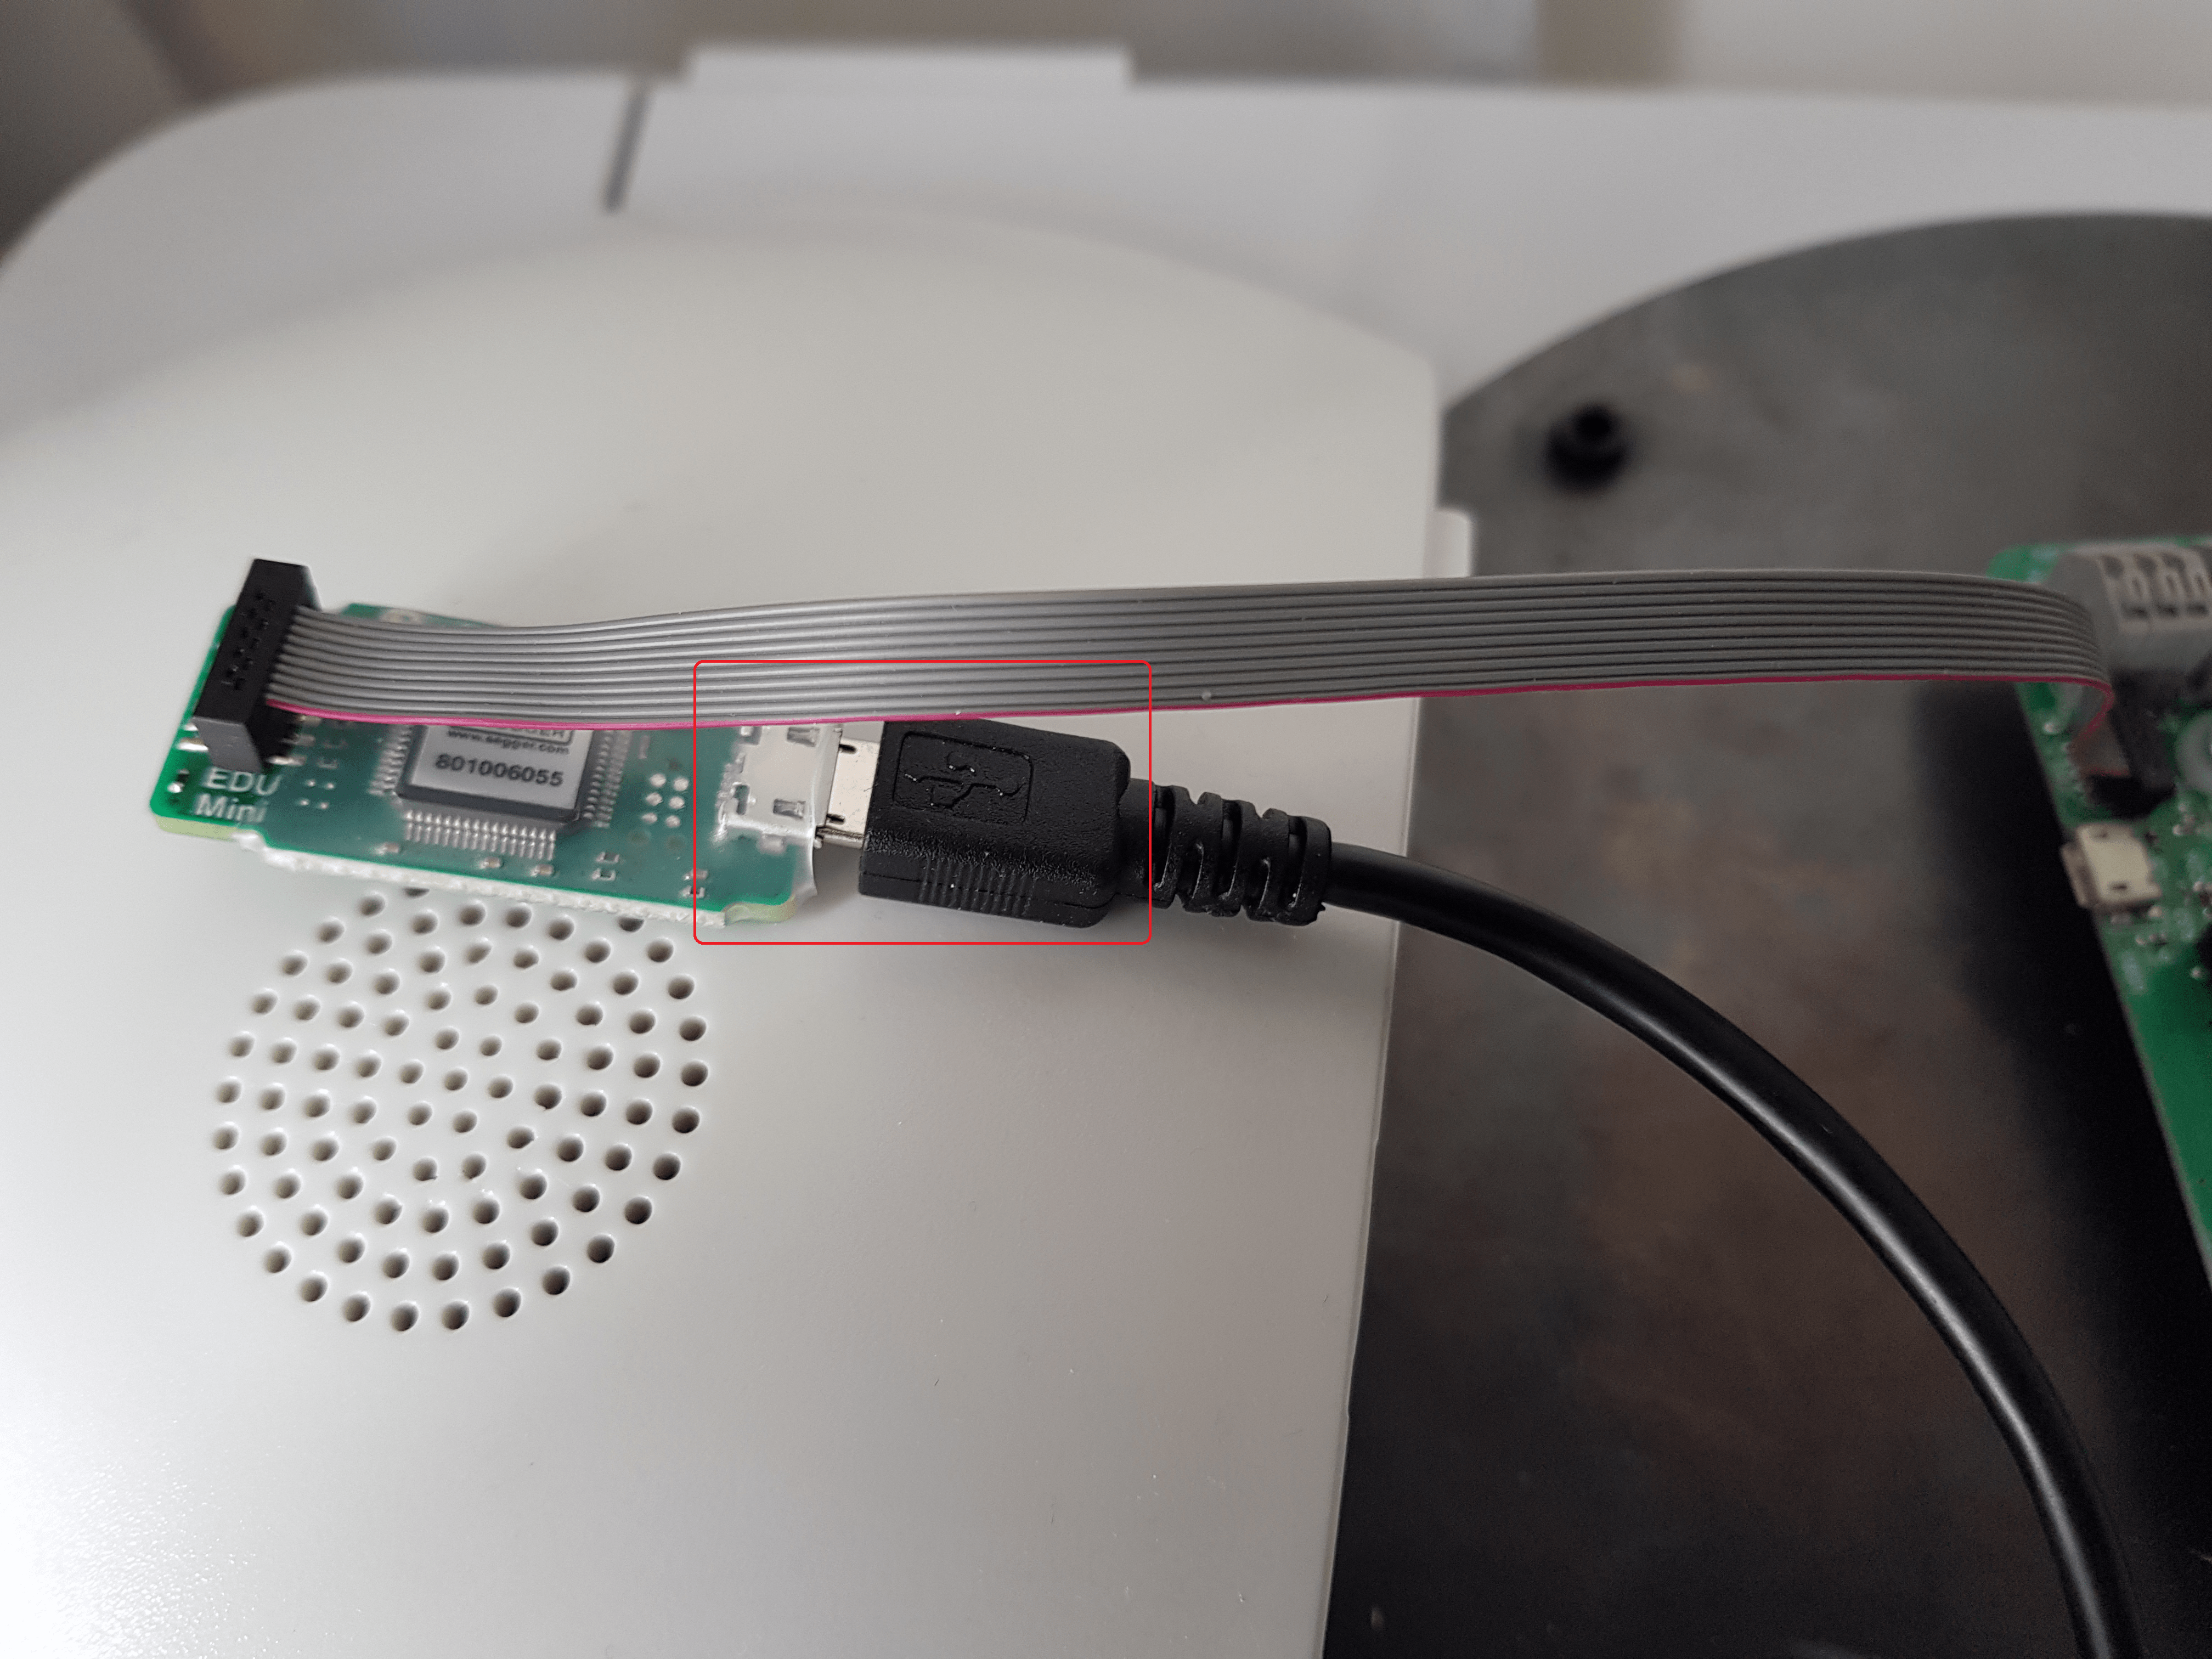
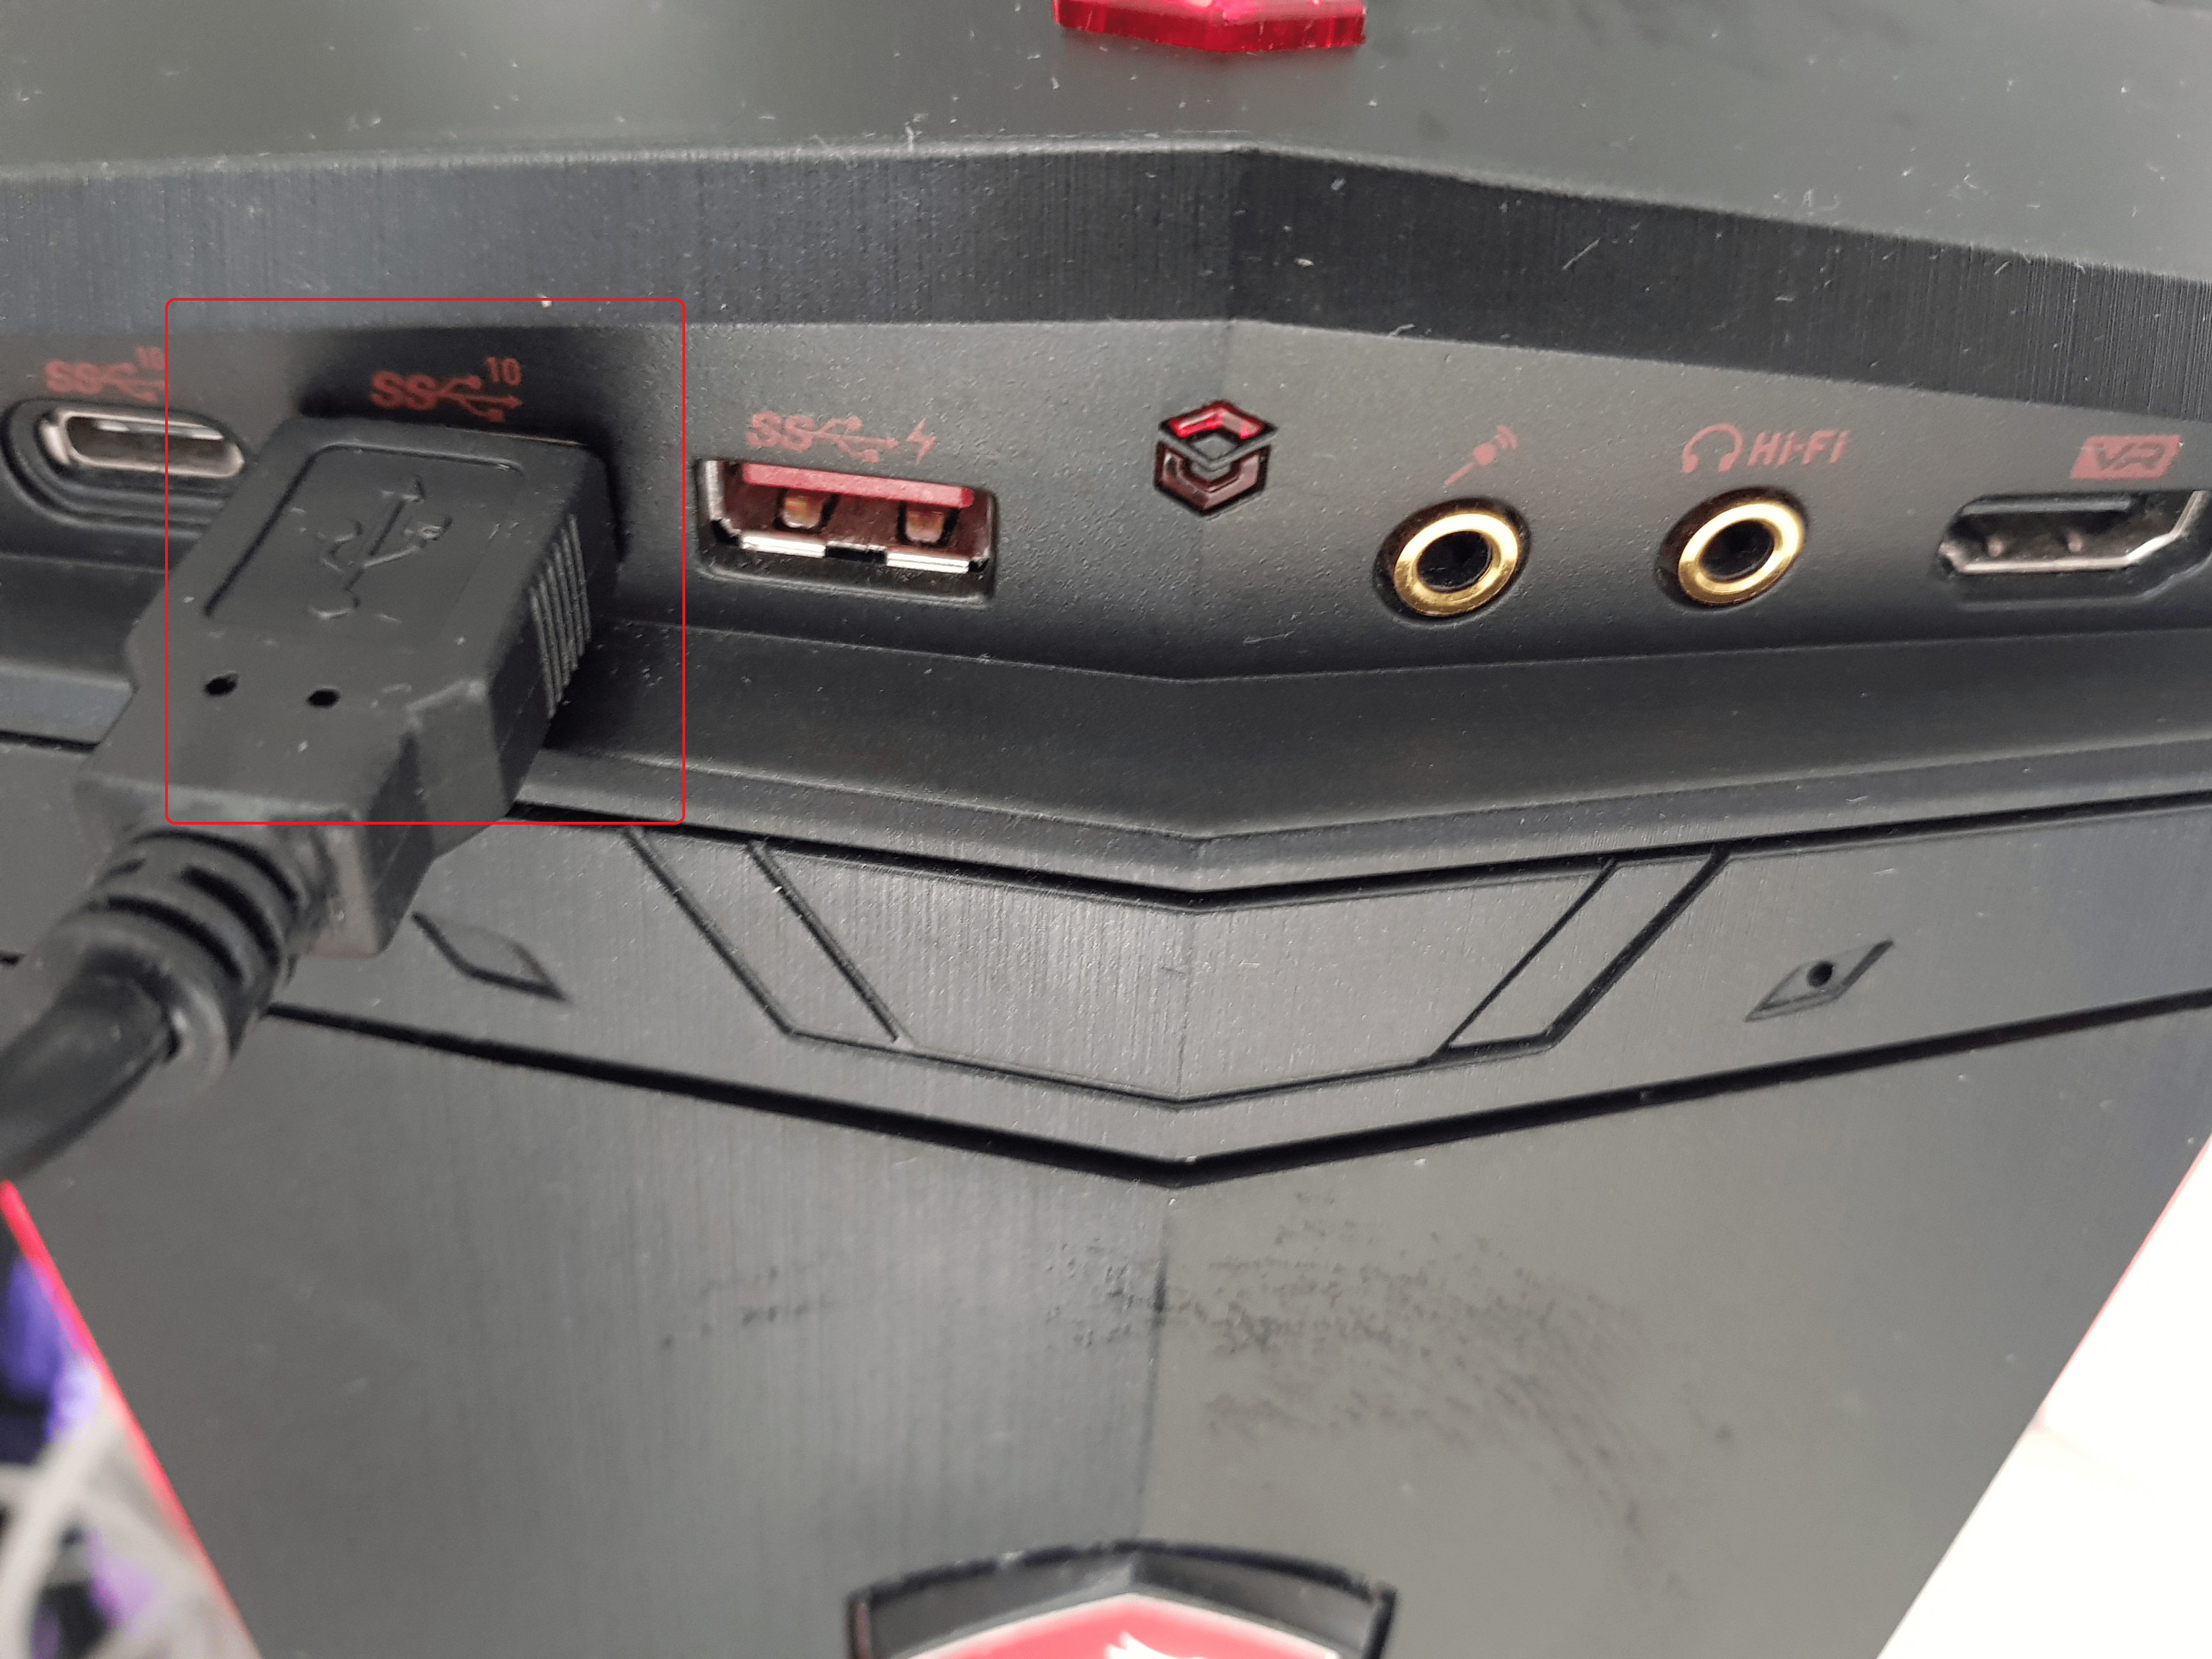
- Plug in the USB cable at the side of the micro USB connector in the J-Link.
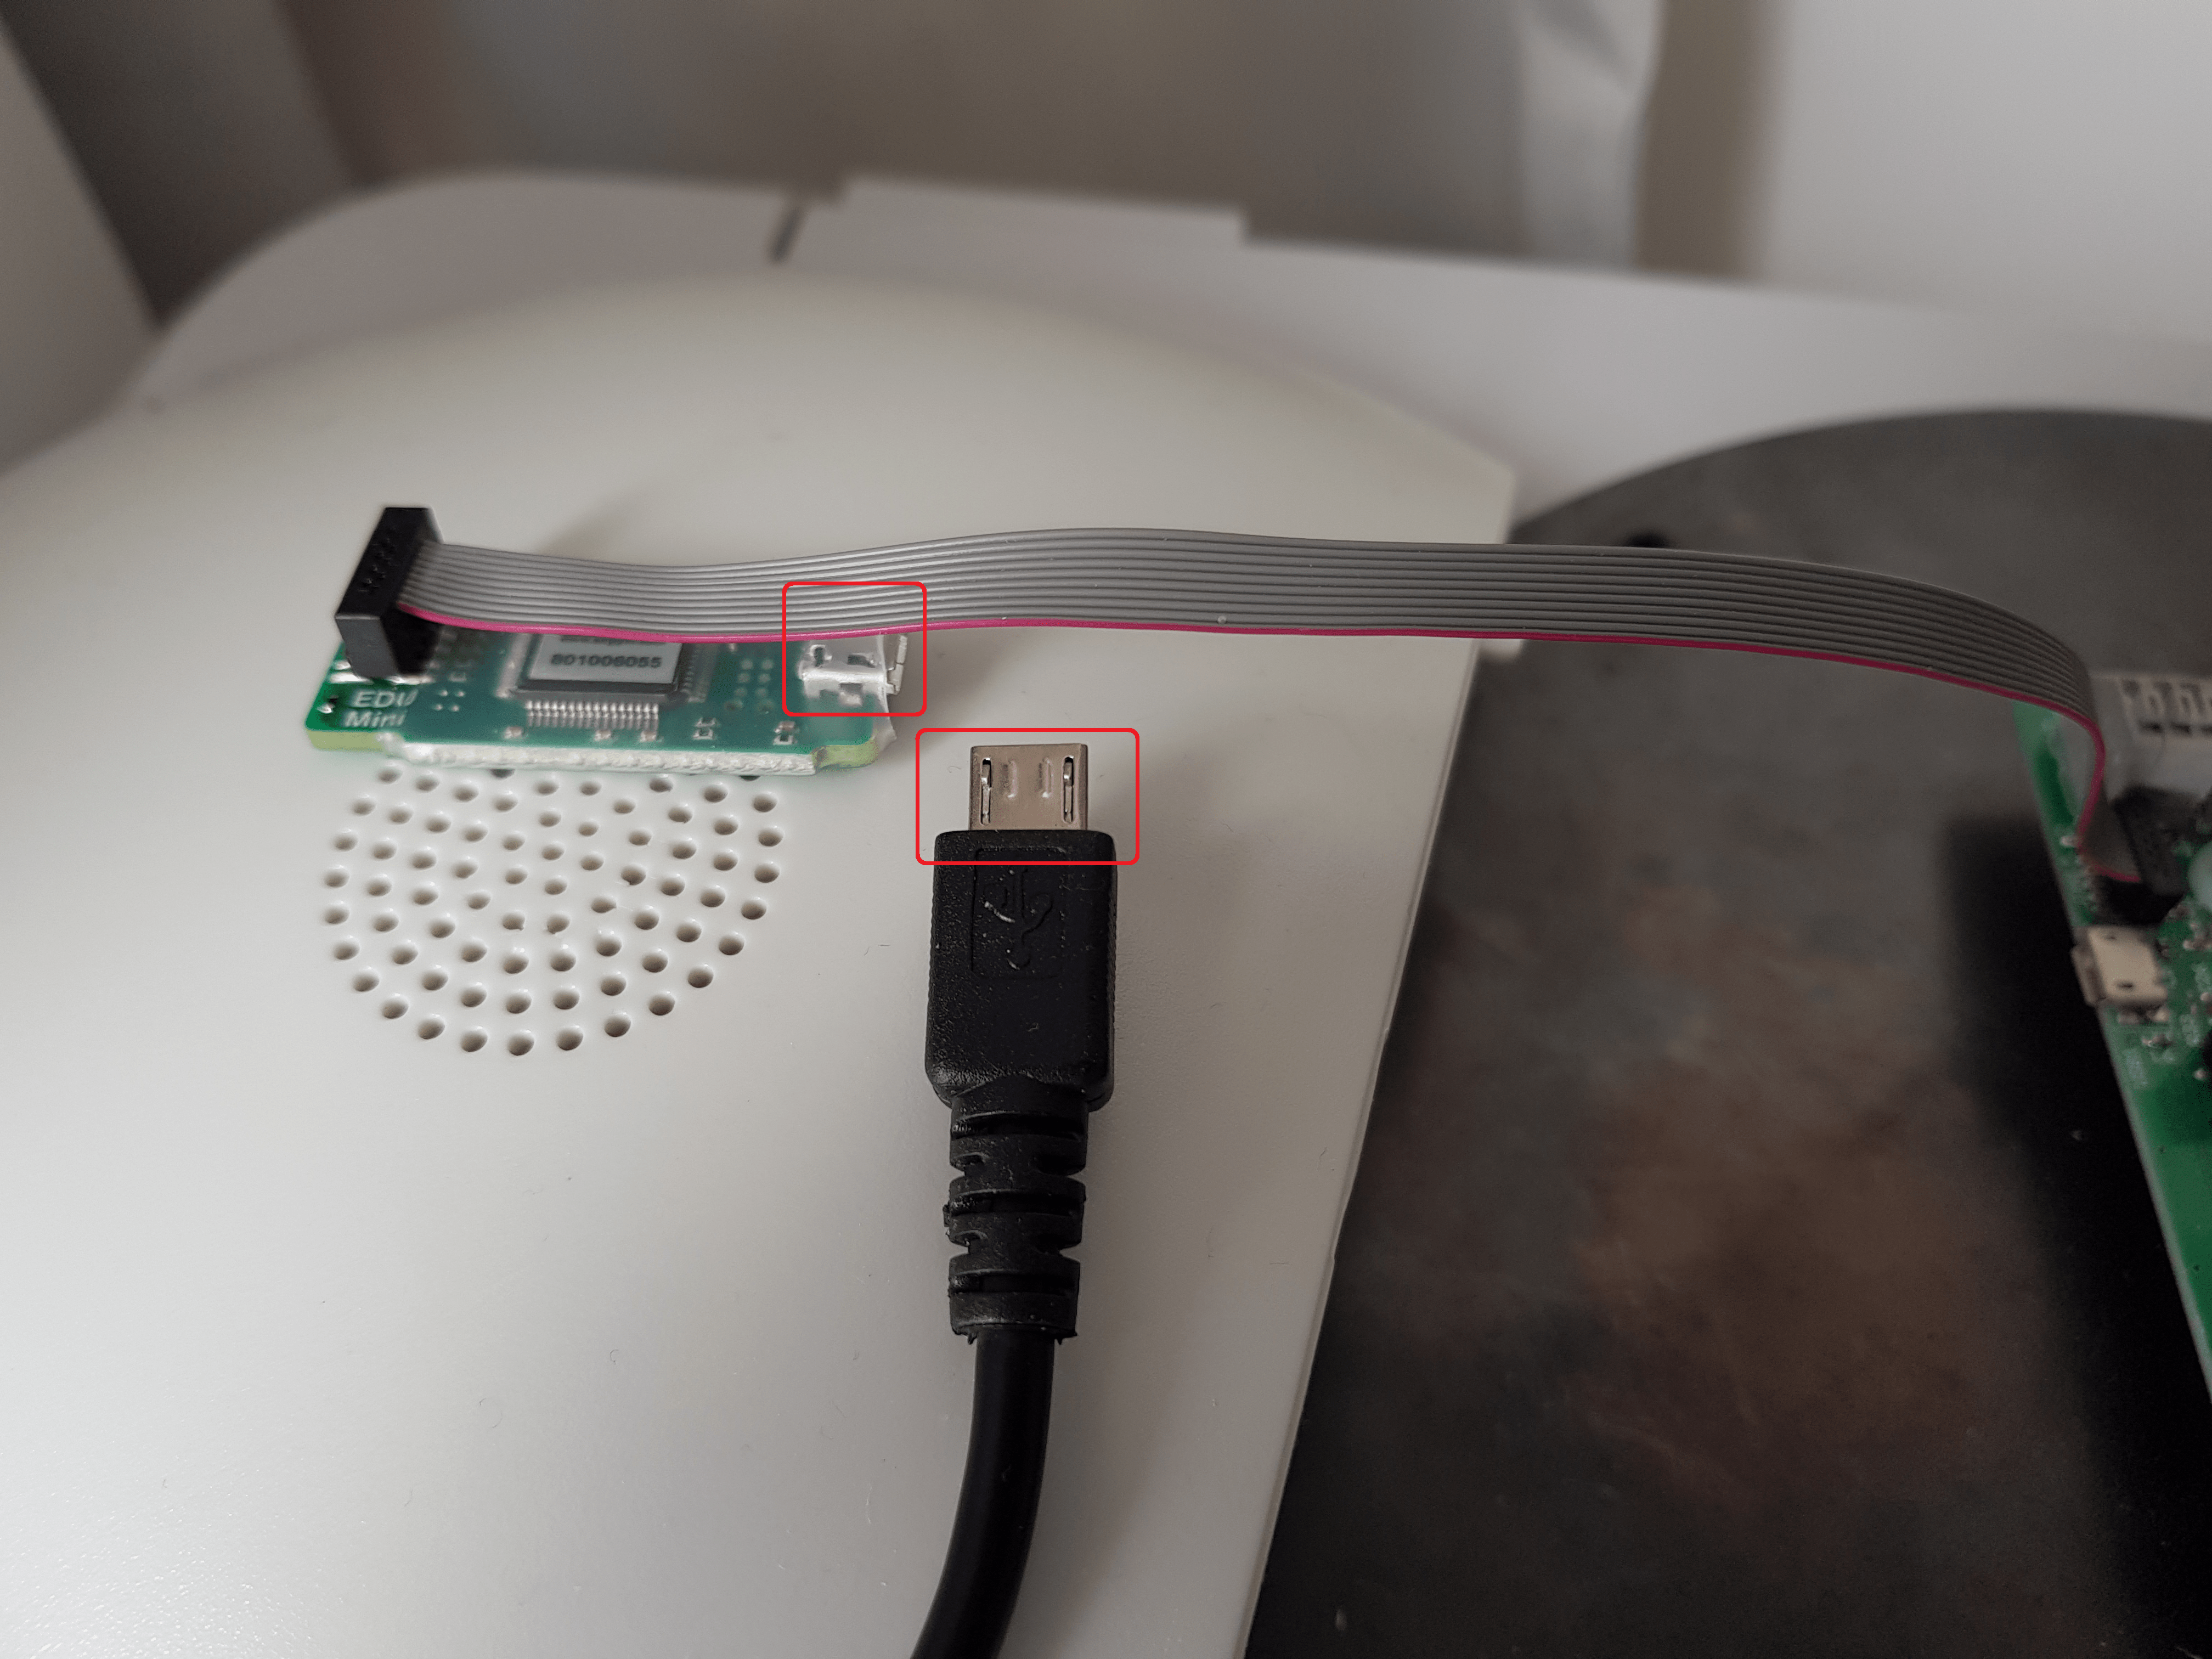
- Plug in the other side of the USB cable in the free USB port of your laptop or pc. The laptop or pc can be powered on.
- Plug in again the powerconnector of Q.bo.
- Turn Q.bo on. Note that Q.bo will not do anything as you have disconnected the Raspberry Pi board.
- Unzip FirmWarePlacasQboOne.zip in your Documents folder (or any other folder you choose).
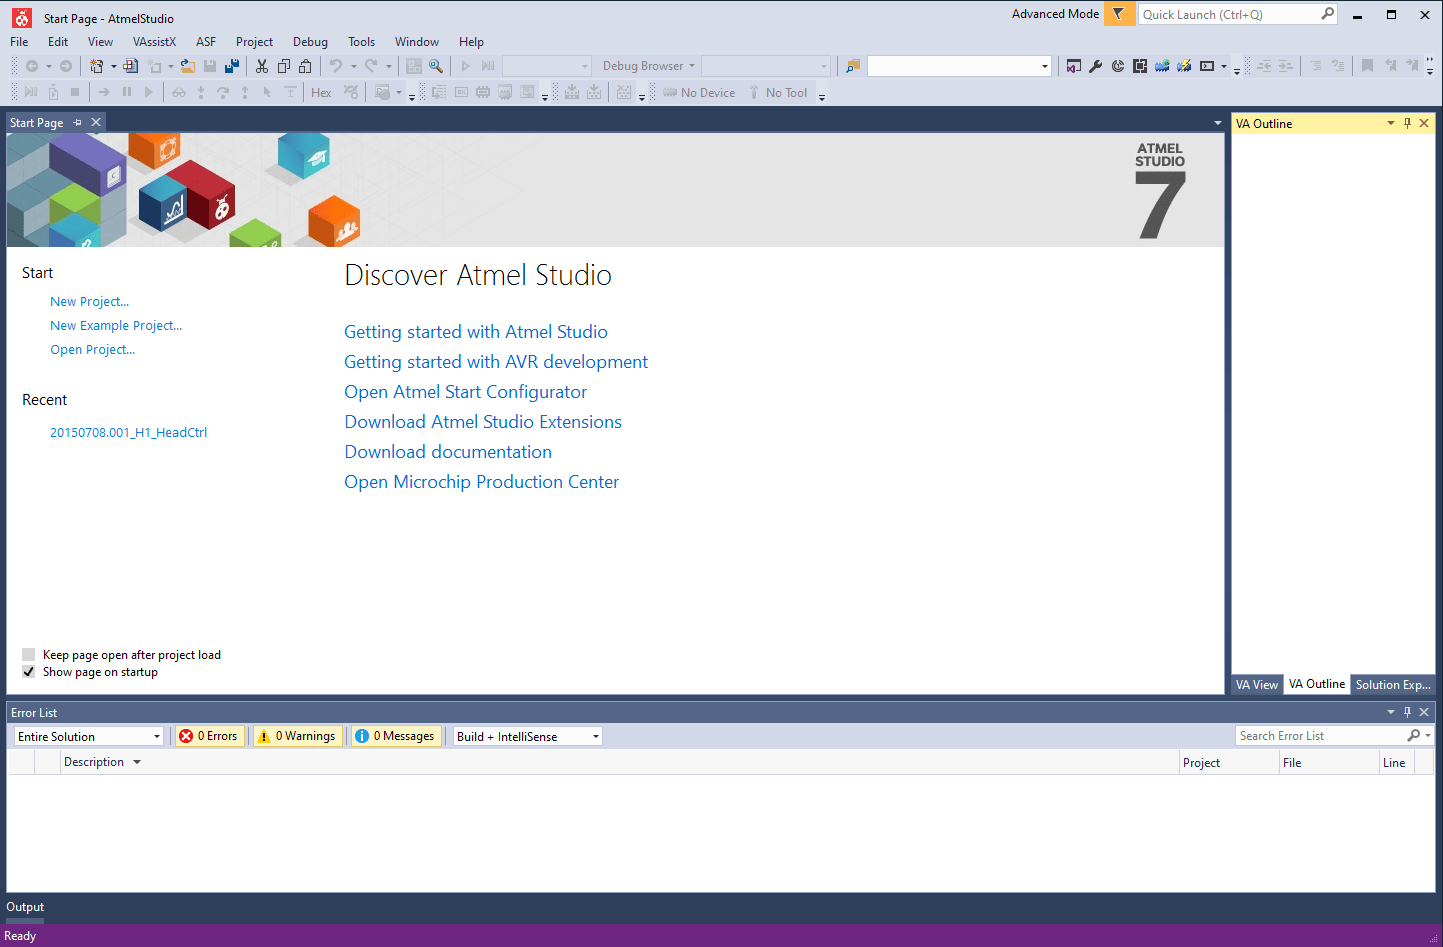
- Open Atmel Studio.
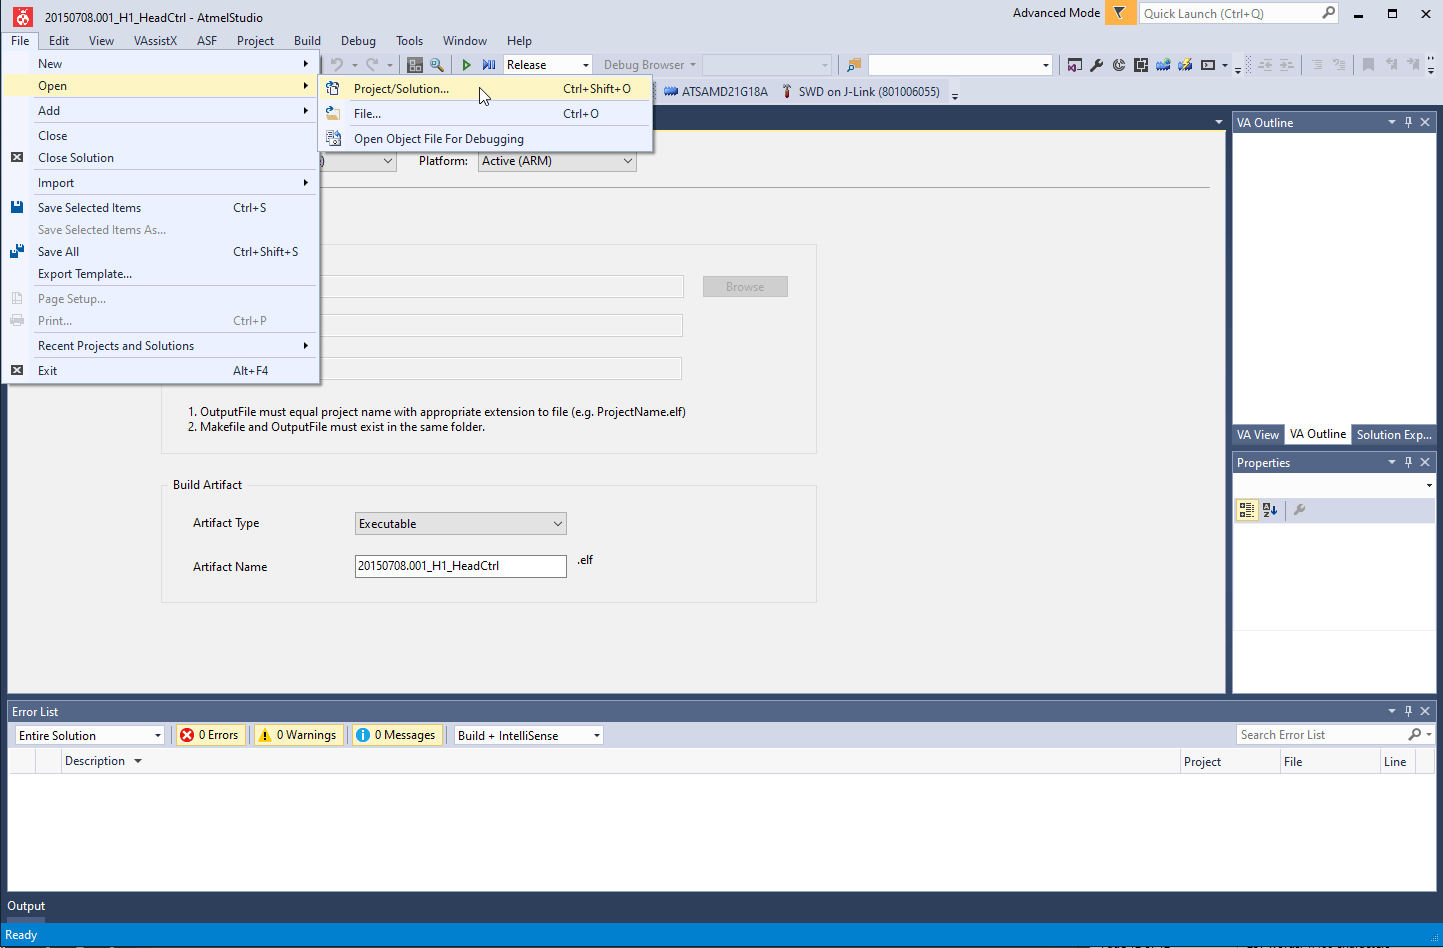
- Click ‘File’, ‘Open’ and ‘Project/Solution...’
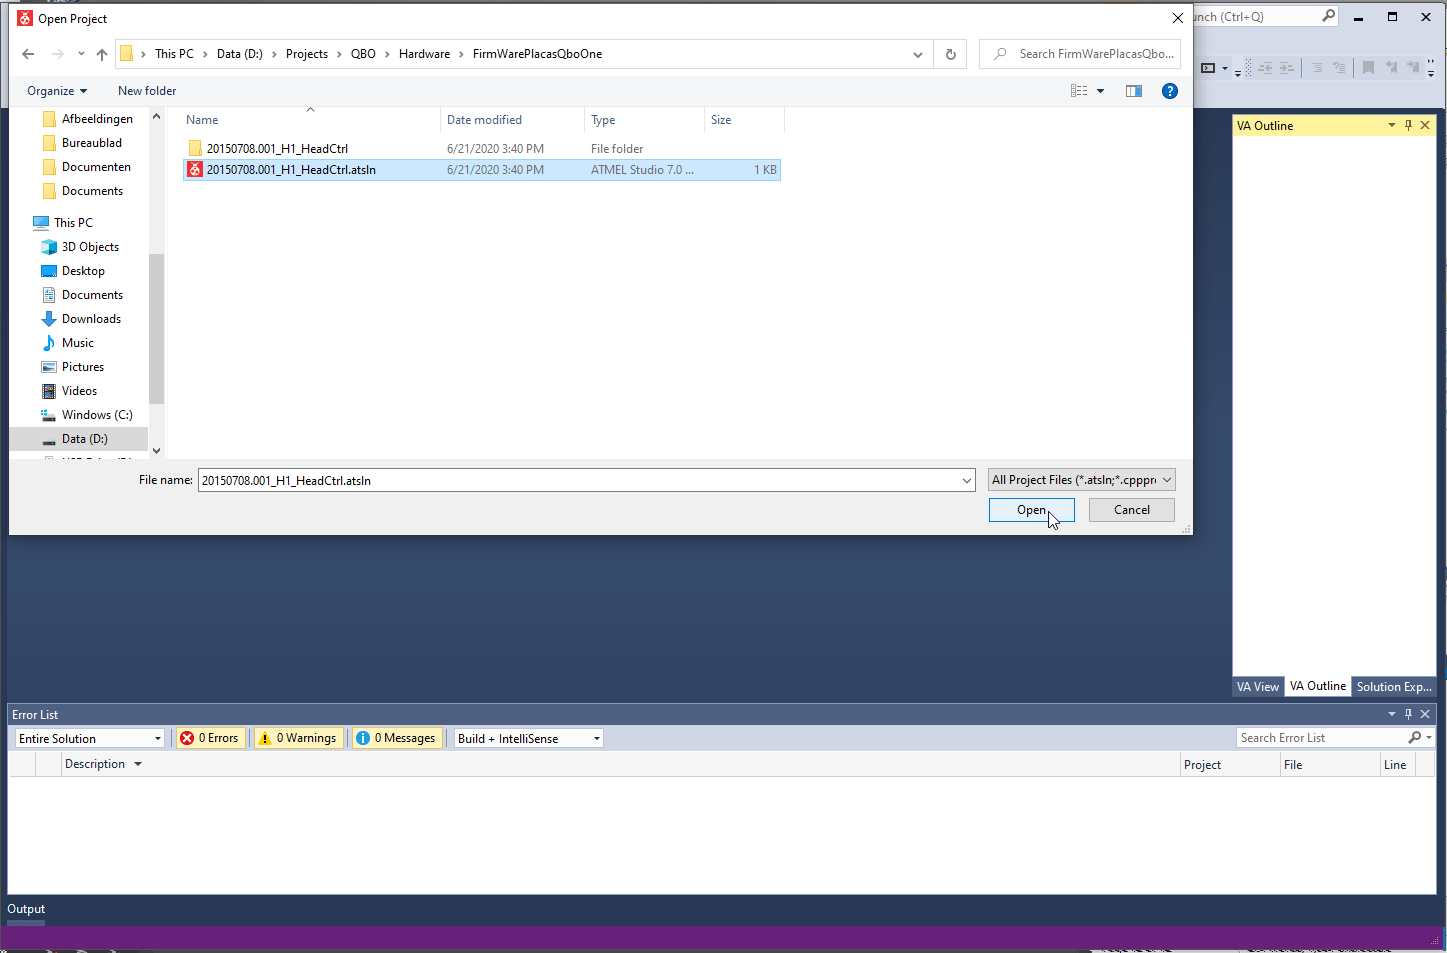
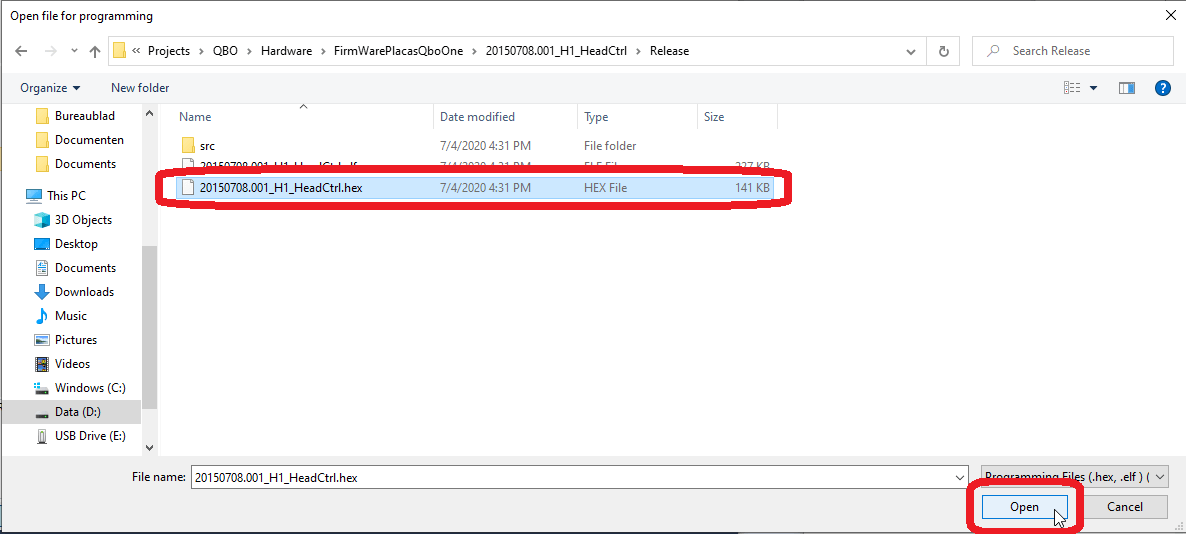
- Browse to the unzipped folder ‘FirmWarePlacasQboOne’, select ‘20150708.001_H1_HeadCtrl.atsln’ (or a more recent version) and click ‘Open’.
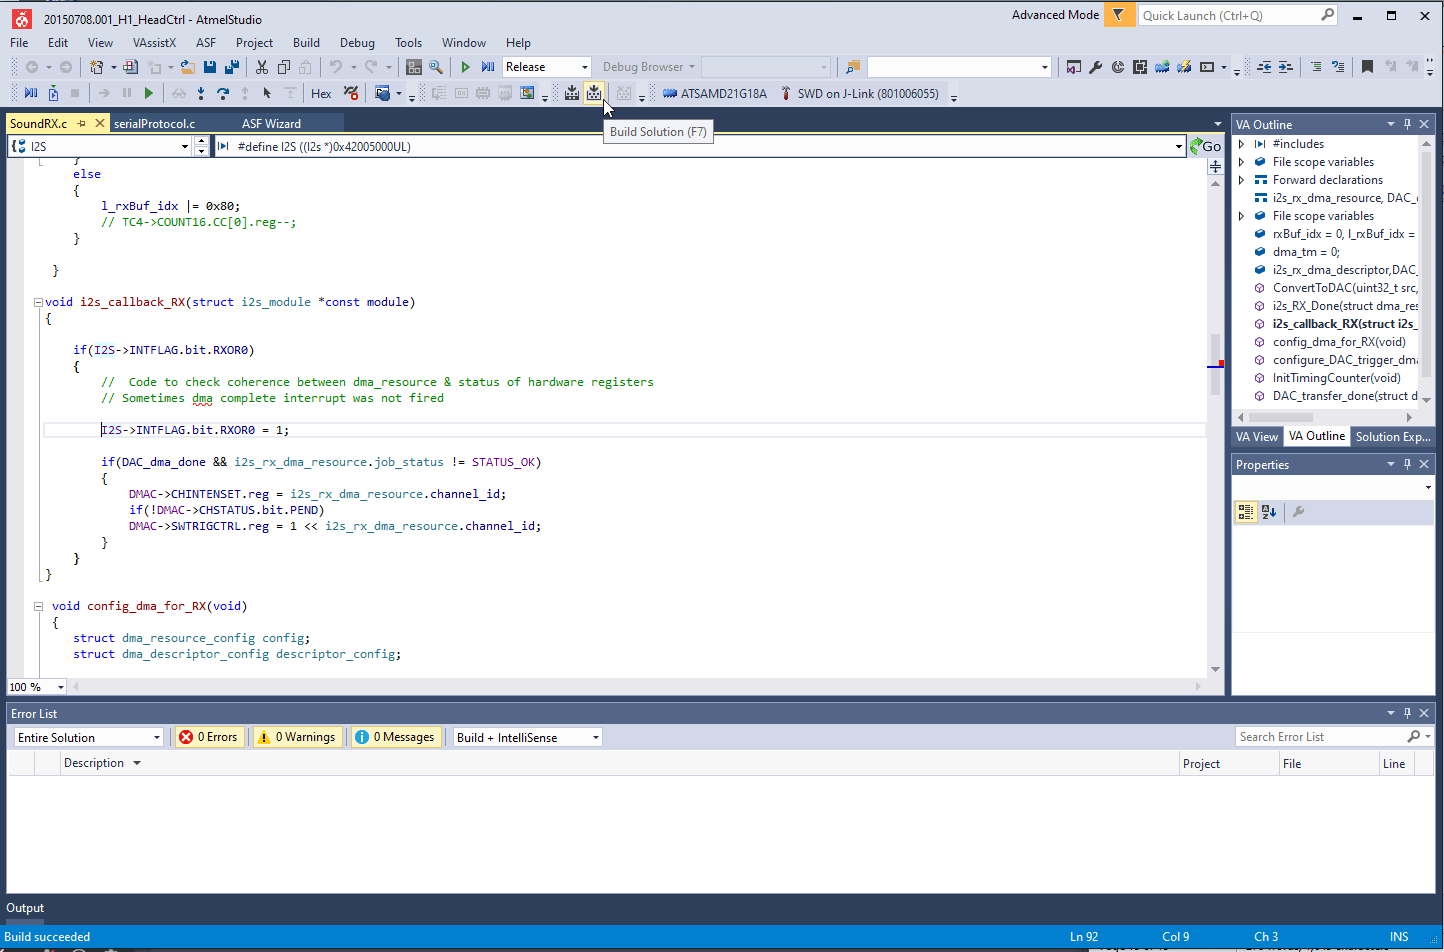
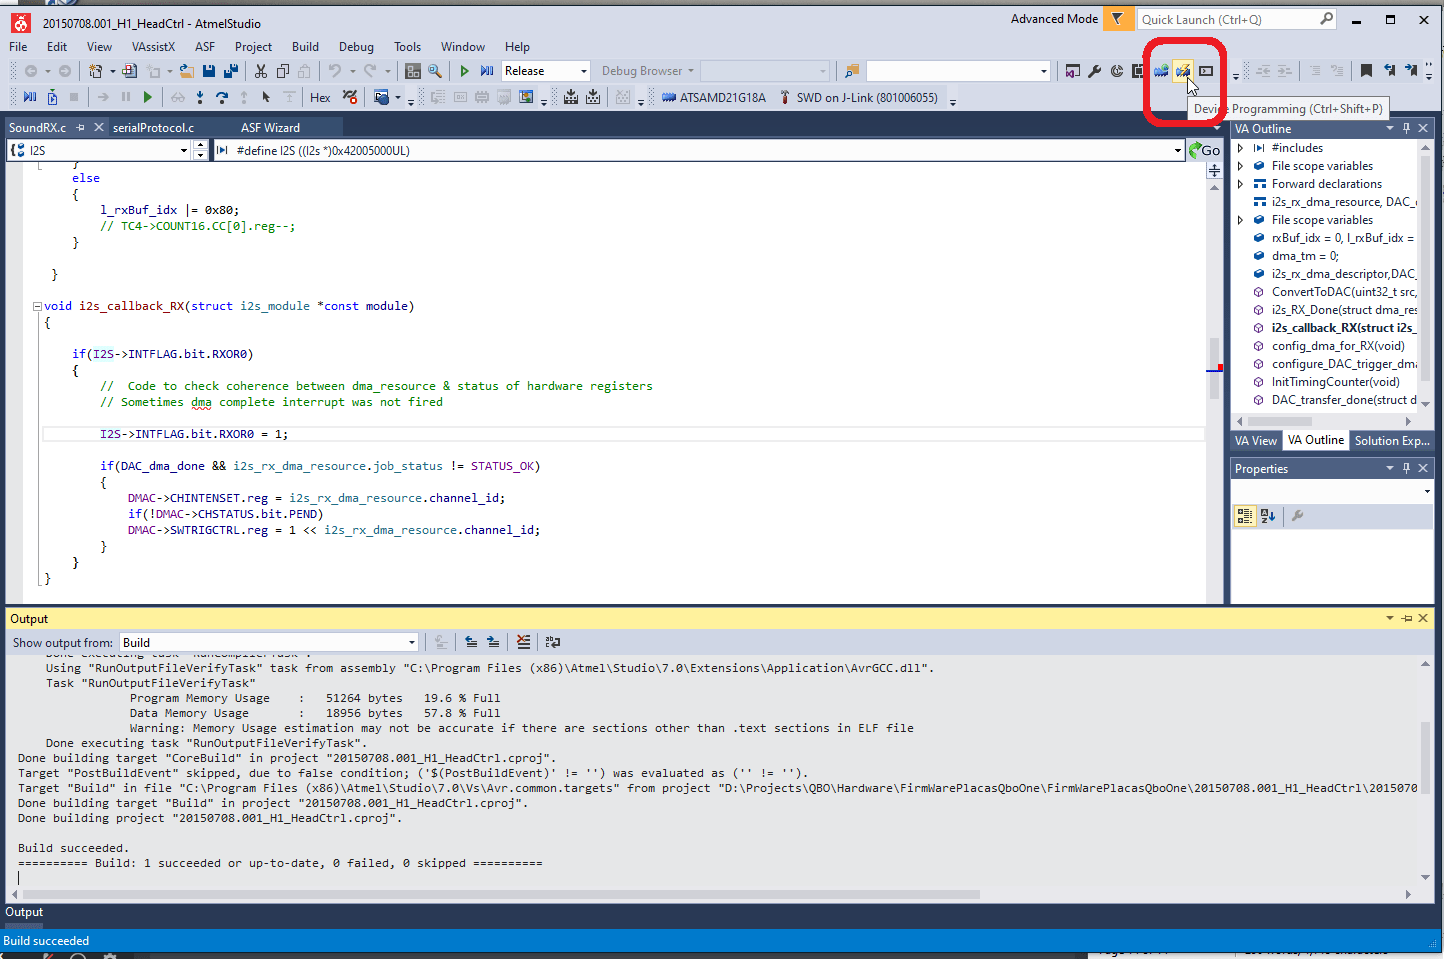
- Build the firmware by clicking the “Build Solution” button or press F7. (Or rebuild completely by pressing Ctrl + Alt + F7.)
- Open the ‘Device Programming’ window by clicking the ‘Device Programming’ button or press Ctrl + Shift + P.
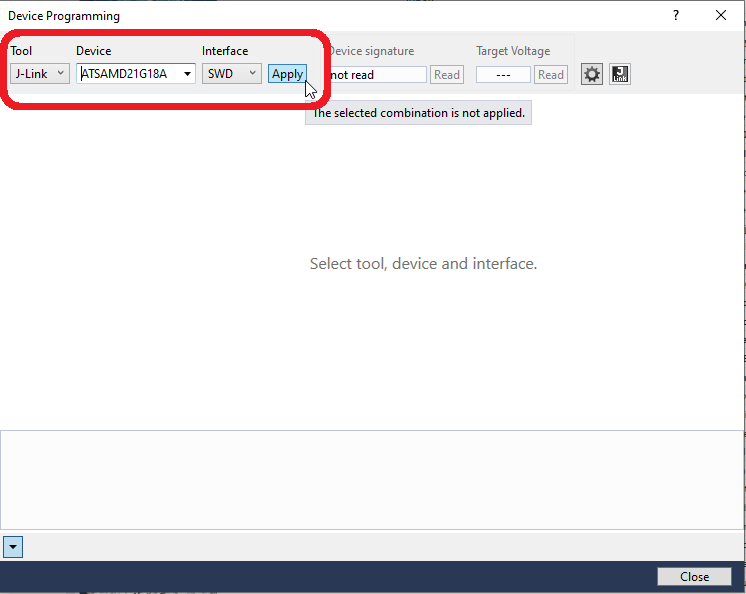
- Select ‘J-Link’ as ‘Tool’, ‘ATSAMD21G18A’ as ‘Device’ and ‘SWD’ as ‘Interface’. Click ‘Apply’.
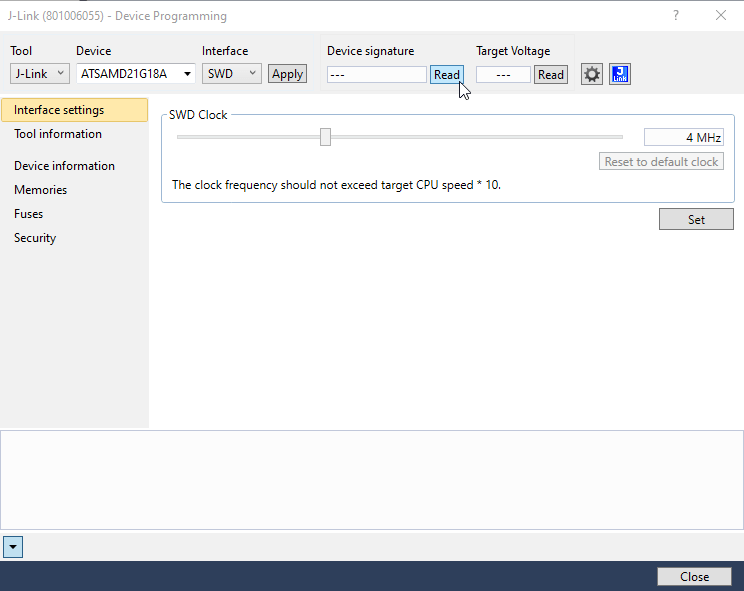
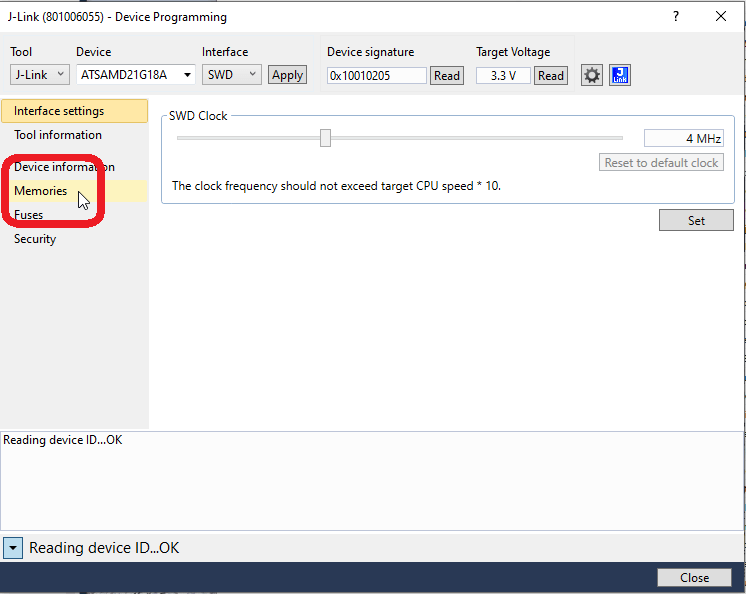
- Click ‘Read’ besides ‘Device signature’.
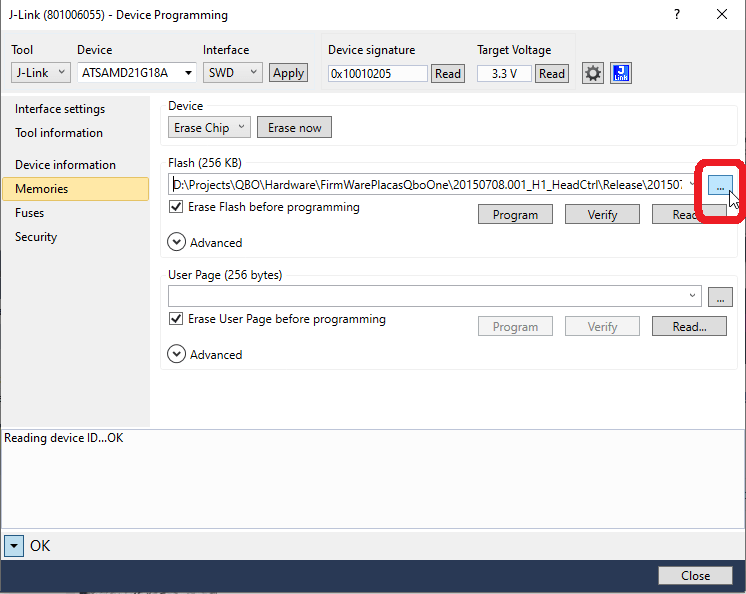
- Select ‘Memories’ in the left column.
- Click on the ‘...’ to select the firmware.
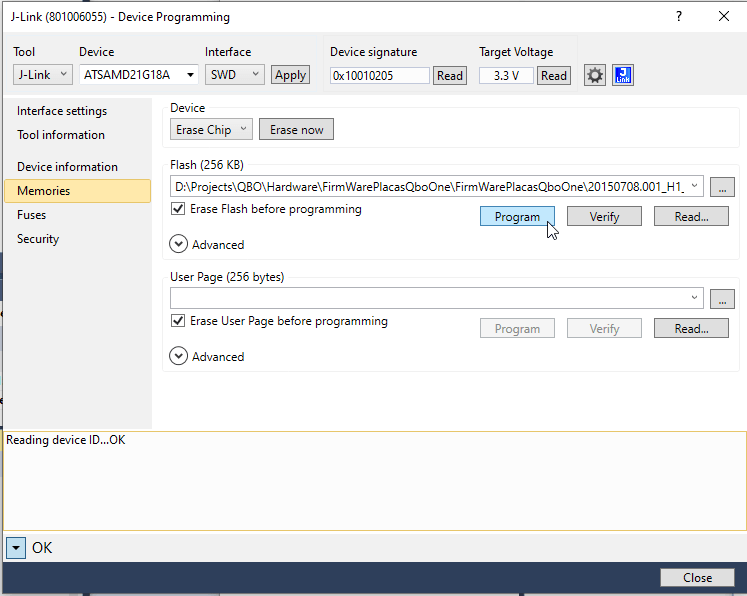
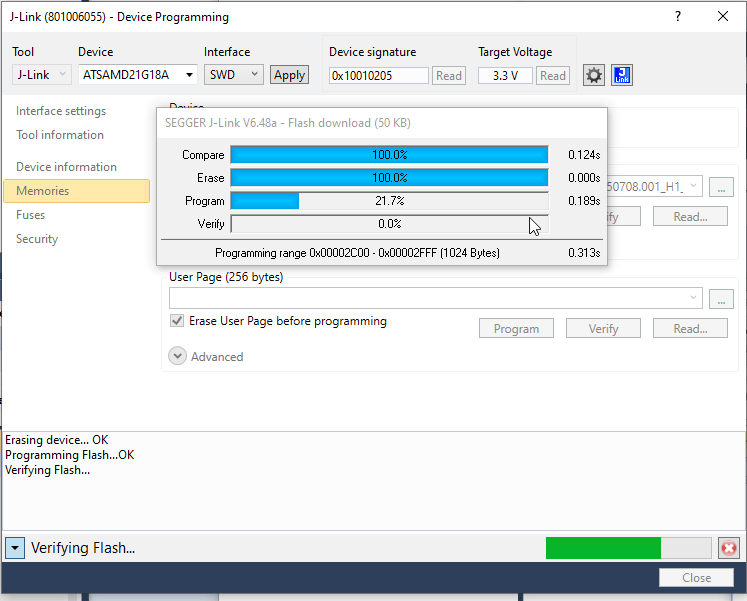
- Click ‘Program’ to upload the firmware to the Q.Board.
